The Combat of Midway took place on June 4–7, 1942, six months later Japan's invasion on Pearl Harbor and one month later the Combat of the Coral Sea in the Pacific Theater of World War II. Frank J. Fletcher, Admirals Chester W. Nimitz, and Raymond A. Spruance of the United States Navy repulsed an invading fleet of the Imperial Japanese Navy led by Admirals Isoroku Yamamoto, Chichi Nagumo, and Nobutake Kond at Midway Atoll, causing catastrophic damage to the Japanese fleet. It was termed "the most stunning and decisive blow in the history of naval warfare" by military historian John Keegan and "one of the most consequential naval engagements in world history" by naval historian Craig Symonds, ranking alongside Salamis, Trafalgar, and Tsushima Strait as tactically decisive and strategically influential.
In response to the Doolittle air attack on Tokyo, luring the American aircraft carriers into a trap and capturing Midway was part of an overarching barrier strategy to extend Japan's defensive perimeter. This operation was also a warm-up for future strikes on Fiji, Samoa, and even Hawaii. Unfortunately, the plan was sabotaged by erroneous Japanese assumptions about the American response and poor early dispositions. Most importantly, American cryptographers learned the planned attack's timing and location, allowing the U.S. Navy to plot its ambush.
The conflict involved four Japanese and three American aircraft ships. The four Japanese naval carriers Akagi, Kaga, Sōryū, and Hiryū, as well as the heavy cruiser Mikuma, were sunk as part of the six-carrier force that had attacked Pearl Harbor six months previously. In addition, the USS Yorktown and the destroyer Hammann were lost in the engagement, although the carriers USS Enterprise and USS Hornet were unharmed.
After Midway and the arduous attrition of the Solomon Islands campaign, Japan's ability to replace lost material, particularly aircraft carriers, and men, particularly well-trained pilots and maintenance crewmen, quickly became insufficient to cope with mounting casualties, whereas the U.S.' massive industrial and training capabilities made losses far easier to replace. The Combat of Midway and the Guadalcanal campaign are primarily regarded as watershed moments in the Pacific War.
Background
The Japanese Empire soon achieved its primary strategic goals after expanding the Pacific War to include Western colonies, capturing British Hong Kong, the Philippines, British Malaya, Singapore, and the Dutch East Indies (now Indonesia). Due to this, preliminary planning for the second phase of operations began in January 1942.
A follow-up strategy was not formulated until April 1942, due to strategic disputes among the Imperial Navy (IJN) and Imperial Army (IJA) and infighting between the Navy's GHQ and Admiral Isoroku Yamamoto's Combined Fleet. Admiral Yamamoto won the bureaucratic battle with a thinly veiled threat to resign, and his Central Pacific plan was adopted as a result.
Yamamoto's main strategic objective was to eliminate America's carrier forces, which he saw as the main threat to the Pacific campaign. While the attack was inconsequential militarily, it shocked the Japanese. Moreover, it demonstrated the presence of a gap in the Japanese home islands' defences and the susceptibility of Japanese territory to American bombers.
This, along with previous successful hit-and-run assaults by American carriers in the South Pacific, demonstrated that they remained a menace, despite their reluctance to engage in all-out combat. Yamamoto reasoned that another airstrike on Pearl Harbor, the United States' primary naval base, would prompt the entire American fleet, including the carriers, to sail out to battle. However, given the enhanced strength of American land-based airpower on the Hawaiian Islands since the previous year's 7 December raid, he determined that attacking Pearl Harbor directly was now too dangerous.
Yamamoto instead chose Midway, a tiny atoll 1,300 miles northwest of the Hawaiian Islands group. Midway was not particularly significant in the grand scheme of things for Japan. Still, the Japanese believed the Americans would regard it as a critical outpost of Pearl Harbor and would be forced to defend it vigorously. Midway was considered crucial by the United States. A U.S. submarine facility was established on Midway following the conflict, allowing submarines operating from Pearl Harbor to refuel and re-provision, increasing their operational radius by 1,200 miles.
Yamamoto's battle plan for conquering Midway, codenamed Operation MI, was highly sophisticated, typical of Japanese naval strategy during WWII. Over hundreds of miles of open water necessitated several fighting formations' careful and timely coordination. After Nagumo's carriers had damaged them sufficiently for a daylight gun duel, they were supposed to come up and kill whatever sections of the U.S. navy would come to Midway's defence. This strategy was the standard operating procedure in most powerful navies.
Yamamoto had no idea that the U.S. had cracked elements of the primary Japanese naval code, revealing many specifics of his strategy to the adversary. His concentration on dispersion also meant that none of his formations could help the others. Even though Nagumo's carriers were anticipated to carry out strikes against Midway and face the brunt of American counterattacks, his fleet only had two Kongō-class fast battleships, two heavy cruisers, and one light cruiser larger than the screening force of twelve destroyers.
On the other hand, Yamamoto and Kondo possessed two light carriers, five battleships, four heavy cruisers, and two light cruisers between them, none present at Midway. Consequently, the trailing forces' light carriers and Yamamoto's three battleships could not keep up with the Kidō Butai's carriers and could not have sailed alongside them. Moreover, Nagumo lacked the invaluable reconnaissance capability of the cruisers and carriers' scout planes and the added anti-aircraft firepower of the cruisers and the other two Kongō-class battleships in the trailing forces.
The Imperial Japanese Navy committed to supporting their invasion of the United States through the Aleutian Islands of Attu and Kiska, which are part of the organised incorporated Alaska Territory, to gain help from the Imperial Japanese Army for the Midway operation. Even though many prior historical accounts viewed the Aleutians operation as a ruse to distract American forces, the original Japanese battle plan called for A.L. to be launched concurrently with the attack on Midway.
Prelude
Admiral Chester W. Nimitz, Commander in Chief, Pacific Ocean Areas, needed every available flight deck to fight an opponent estimated to field four or five carriers. He by now had Vice Admiral William Halsey's two-carrier task force (Enterprise and Hornet) on hand. However, Halsey suffered from severe dermatitis and had to be replaced by Halsey's escort commander, Rear Admiral Raymond A. Spruance. Rear Admiral Frank Jack Fletcher's task force, which included the carrier Yorktown, was also quickly recalled by Nimitz from the South-West Pacific Area.
Despite predictions that Yorktown, which had been damaged in the Battle of the Coral Sea, would require months of repairs at Puget Sound Naval Shipyard, her elevators and flight deck were primarily intact. The Pearl Harbor Naval Shipyard laboured around the clock to repair her to a battle-ready state in 72 hours, which Nimitz required two or three weeks of operations. Her flight deck was mended, and internal structural portions were ripped out and replaced. Fighting Three (VF-3) was formed to replace VF-42, with sixteen VF-42 pilots and eleven VF-3 pilots, under Lieutenant Commander John S. Some of the aircrew were inexperienced, which may have contributed to the death of Lieutenant Commander Donald Lovelace, Thach's executive officer. Despite efforts to prepare Saratoga, undergoing repairs on the American West Coast, she could not reach Midway until after the combat due to the necessity to replenish and assemble sufficient escorts.
The U.S. Navy had positioned four regiments of PBYs (totalling 31 aircraft) on Midway, as well as six brand-new Grumman TBF Avengers from Hornet's VT-8 by 4 June,. In addition, 19 Douglas SBD Dauntless, seven F4F-3 Wildcats, 17 Vought SB2U Vindicators, and 21 Brewster F2A Buffalos were stationed by the Marine Corps.
The Japanese light carrier Shh had been sunk during the Battle of the Coral Sea a month before, while the fleet carrier Shōhō had been seriously damaged by three bomb hits and was in drydock for months of repairs. Although the fleet carrier Zuikaku escaped the conflict unscathed, she lost nearly half of her air group and awaited replacement planes and pilots in Kure. Finally, the Yokosuka Air Corps instructors were sent to make a difference.
Historians Jonathan Parshall and Anthony Tully argue that by combining the surviving aircraft and pilots from Shōkaku and Zuikaku, Zuikaku might have had a nearly complete composite air group. However, they further point out that doing so would have violated Japanese carrier doctrine, emphasising the importance of carriers and their air units training together. On the other hand, American air units were interchangeable between carriers. In any event, it appears that the Japanese made no meaningful effort to prepare Zuikaku for the upcoming fight.
As a result, Carrier Division 5, which consisted of the Kido Butai's two most sophisticated aircraft carriers, was unavailable, leaving Vice-Admiral Nagumo with only two-thirds of the fleet's ships. Carrier Division 1 comprises Kaga and Akagi, while Carrier Division 2 is made up of Hiryū and Sōryū. Nevertheless, since 7 December 1941, Japanese carriers have been on regular operations, including raids on Darwin and Colombo. Despite this, the First Carrier Strike Force sailed with 248 aircraft available across four pages.
THE PRINCIPAL JAPANESE CARRIER-BORNE STRIKE AIRCRAFT WERE the D3A1 "Val" dive bomber and the B5N2 "Kate," which could be utilised as a torpedo bomber or a level bomber. Due to these constraints, all Kido Butai carriers had fewer aircraft than usual, with few reserve aircraft or parts kept in the carriers' hangars.
Nagumo's carrier force also suffered from several defensive flaws, giving it a "glass jaw," as Mark Peattie put it. It could deliver a punch but not receive one. The effectiveness of Japanese carrier anti-aircraft weapons and associated fire control systems were hampered by many design and configuration flaws. Because of Yamamoto's hurry, a picket line of Japanese submarines was late getting into position, allowing the American carriers to reach their gathering site northeast of Midway known as "Point Luck" without being spotted.
Operation K, a second reconnaissance mission using four-engine H8K "Emily" flying boats to scout Pearl Harbor before the battle and detect whether American carriers were present, was dissatisfied when Japanese submarines dispensed to refuel the search airplane exposed that the intended refuelling point, a previously abandoned bay off French Frigate Shoals, was now engaged by American war vessel because the Japanese had carried out an identical mission in March. As a result, Japan was utterly unaware of the movements of the American carriers before the combat.
American submarine activity and message traffic increased, according to Japanese radio intercepts. Yamamoto, who was at sea on Yamato, assumed Nagumo had received the identical signal from Tokyo and chose not to speak with him via radio to keep his position a secret. Nagumo also received these messages before the war began, contrary to earlier historical reports.
The location of "A.F." was first unknown, but Commander Joseph Rochefort and his colleagues at Station HYPO could confirm that it was Midway. Then, Captain Wilfred Holmes developed a ploy. He used a secure undersea connection to send an uncoded radio message to Midway's base, claiming that the base's water purification system had failed. Within 24 hours, the code breakers received a Japanese communication indicating that "A.F." was running low on water. Moreover, no Japanese radio operators who intercepted the transmission seemed concerned that the Americans were broadcasting uncoded that a critical naval base adjacent to the Japanese threat ring was experiencing a water shortage, alerting Japanese intelligence officers to the hoax. HYPO was also able to pinpoint the attack's date as either 4 or 5 June and give Nimitz a comprehensive IJN combat plan. In addition, the deployment of a new codebook in Japan had been delayed, allowing HYPO to read messages for many vital days.
Battle
Ensign Jack Reid, piloting a PBY from U.S. Navy patrol squadron VP-44, discovered the Japanese Occupation Force 500 nautical miles away at about 09:00 on 3 June. Although their crews claimed to have hit four ships, none of the bombs hit anything, and no severe damage was done. However, the Japanese oil ship Akebono Maru took the first hit early the following day when a torpedo from an attacking PBY damaged her around 01:00. This was the U.S.'s only successful air-launched torpedo attack during the whole conflict.
Nagumo conducted his first attack on Midway at 04:30 on 4 June, using 36 Nakajima B5N torpedo bombers and 36 Aichi D3A dive bombers escorted by 36 Mitsubishi A6M Zero fighters. 11 PBYs were departuring Midway to run their search forms as Nagumo's bombers and fighters took off. At 05:34, a PBY reported seeing two Japanese carriers, and 10 minutes later, another PBY saw the impending airstrike.
Midway's radar detected the adversary from several miles, and interceptors were scrambled. Unaccompanied bombers attacked the Japanese carriers, while their fighter escorts stayed behind to protect Midway. At 06:20, Japanese carrier planes bombed the U.S. facility, severely damaging it. Six F4Fs and 20 F2As from Parks intercepted the Japanese and suffered heavy losses. However, they did manage to destroy four B5Ns and one A6M. Anti-aircraft fire from the United States was fierce and precise, abolishing three more Japanese planes and damaging several more.
11 Japanese aircraft were destroyed in this raid, including three that ditched, 14 were severely damaged, and 29 were damaged to some extent. However, Midway was not neutralised in the initial Japanese attack. Midway's land-based defences remained intact, and American aircraft could still utilise the airstrip to refuel and attack the Japanese invasion force. If troops were to get ashore by 7 June, Japanese pilots reported to Nagumo that a second aerial strike on Midway's fortifications would be required.
American bombers based at Midway launched repeated assaults on the Japanese carrier force after taking off before the Japanese onslaught. VMSB-241 consists of 11 SB2U-3s and 16 SBDs and four torpedo-equipped USAAF B-26s from the 18th Reconnaissance and 69th Bomb Squadrons and 15 B-17s from the 31st, 72nd, and 431st Bomb Squadrons. The Japanese thwarted these attacks, who lost three planes while destroying five TBFs, two SB2Us, eight SBDs, and two B-26s. Major Lofton R. was one of the victims. The B-26 strafed Akagi on the fly down the length, killing two soldiers. A B-26 bomber that had been severely wounded by anti-aircraft fire continued on its mission, heading straight for Akagi's bridge. Before cartwheeling into the water, the aircraft, possibly attempting self-annihilation hitting or out of control due to combat mutilation or a wounded or killed pilot, narrowly avoided slamming into the carrier's bridge, killing Nagumo and his command staff. Nagumo's decision to attack Midway again, in direct violation of Yamamoto's directive to preserve the reserve strike force armed for anti-ship operations, may have been influenced by this incident.
While the airstrikes from Midway were taking place, the American submarine Nautilus came close to the Japanese fleet, drawing escorts' attention. She launched an unsuccessful torpedo strike on a battleship around 08:20 and subsequently had to dive to avoid the guards. Then, at 09:10, she fired a torpedo at a cruiser and had to dive to avoid the escorts once more, with the destroyer Arashi trailing her for a long time.
Nagumo should strike immediately with the forces at hand, according to Carrier Division 2 commander Rear Admiral Tamon Yamaguchi. On Sōryū, there are 16 Aichi D3A1 dive bombers, while on Hiryū, there are 18 Aichi D3A1 dive bombers and half of the ready cover patrol aircraft. Nagumo's Midway attack force's anticipated return hindered Nagumo's ability to hit the American ships. The Japanese never had a chance to place ("spot") their backup planes on the flight deck for launch because of the ongoing flight deck activity involved with combat air patrol operations over the preceding hour.
The limited aircraft on the Japanese flight decks at the time of the attack were either defensive fighters or fighters sighted to supplement the combat air patrol, as in the case of Sōryū. It would have engaged at least 30 minutes to locate his flight decks and launch planes. Besides, by detection and launching instantly, Nagumo would be committing some of his reserves to battle without proper anti-ship armament or fighter escort; in the end, Nagumo decided to wait for his first strike force to land before launching the reserve, which would be adequately armed with torpedoes by that time.
Nagumo could have built a robust and well-balanced strike package capable of sinking two American carriers if he had chosen to deploy the available aircraft around 07:45 instead of risking the ditching of Tomonaga's strike force. Furthermore, fueled and armed aircraft onboard the ships posed a substantial additional threat to the carriers in terms of damage in the case of an attack, and keeping them on the decks was far riskier than getting them airborne. Whatever the situation, there was no way to stop Fletcher's carriers from launching their planes beginning at 7:00 a.m., with Enterprise and Hornet completing their launches by 07:55 a.m. Still, Yorktown not until 09:08 a.m., thus the aircraft that would deliver the crushing blow were already on their way.
In overall command onboard Yorktown and aided by early morning PBY sighting reports, Fletcher ordered Spruance to start an attack on the Japanese as soon as possible while initially retaining Yorktown in reserve if any other Japanese carriers were discovered. Spruance determined that, despite the considerable range, a strike could be successful and issued the order to attack. A few minutes after 07:00, the first plane took off from Spruance's carriers Enterprise and Hornet. Fletcher followed suit at 08:00 from Yorktown after completing his scouting flights.
Yorktown's commanding officer, Fletcher, Captain Elliott Buckmaster, and their staffs had gained first-hand experience organising and launching a complete strike against an enemy force in the Coral Sea. Still, there was no time to pass these lessons on to the Enterprise and Hornet, tasked with launching the first strike. Because eliminating enemy carriers was critical to the survival of his task force, Spruance commanded the striking airplane to continue to target instantly rather than lose time waiting for the strike force to gather.
While the Japanese could launch 108 planes in seven minutes, Enterprise and Hornet took almost an hour to deploy 117 jets. Spruance determined that the need to throw something at the adversary as soon as possible outweighed the requirement to coordinate the attack by fighters, bombers, and torpedo bombers of various types and speeds. The lack of coordination was acknowledged to reduce the impact of the American aggression and raise deaths. Still, Spruance assessed that this was worth it because keeping the Japanese under aircraft attack hampered their capacity to launch a counter-offensive. Moreover, he gambled that he would find Nagumo with his flight decks at their most vulnerable, as Japanese tactics preferred fully constituted attacks.
American carrier planes had difficulties locating the target despite the positions supplied to them. A couple of TBDs got within a few ship lengths of their targets before dropping their torpedoes close enough to strafe the enemy ships and cause the Japanese carriers to make quick evasive manoeuvres. Still, their torpedoes all missed or failed to explode. Shot after shot of American torpedoes missed their objectives by running directly beneath them deeper than anticipated, exploding prematurely, or hitting targets with an audible clang but failing to explode at all in the early months of the war. Nevertheless, senior Navy and Bureau of Ordnance officers never questioned why a half-dozen torpedoes fired so close to the Japanese carriers failed to hit them.
Despite failing to hit any targets, the American torpedo attacks had three crucial outcomes. Third, many Zeros were running out of ammunition and fuel. Second, at 10:00, the arrival of a third torpedo plane strike from the southeast by VT-3 from Yorktown, commanded by LCDR Lance Edward Massey, soon drew the Japanese CAP to the southeast quadrant of the fleet. Third, Nagumo might have averted or lessened the damage caused by the coming American strikes if he had better discipline and deployed a more significant number of Zeroes for the CAP.
By luck, three squadrons of SBDs from Enterprise and Yorktown were arriving from the southwest and northeast when the Japanese saw VT-3. The Japanese destroyer Arashi, steaming at complete speediness to rejoin Nagumo's carriers after having unsuccessfully depth-charged the U.S. submarine Nautilus, which had unsuccessfully assaulted the battleship Kirishima, was sighted by good fortune. Before the raid, some bombers were lost due to fuel exhaustion.
The destiny of our carrier task force and our forces at Midway was decided by McClusky's choice to continue the search and his judgment, according to Admiral Chester Nimitz. All three American dive-bomber squadrons (VS-6, VB-6, and VB-3) arrived almost simultaneously at the ideal attack timing, location, and altitude. Most of the Japanese CAP was focused on the VT-3 torpedo planes and was out of place. In the meantime, armed Japanese strike aircraft filled the hangar decks, fuel hoses snaked across the decks as refuelling operations were hurriedly completed, and bombs and torpedoes were stacked around the hangars rather than safely stowed in the magazines, making the Japanese carriers extremely vulnerable. Enterprise's air group broke up at 10:22, with one squadron attacking Kaga and the other attacking Akagi.
Hiryū's initial attack wave, consisting of 18 D3As and six fighter escorts, pursued the retreating American planes and struck the first carrier they came across, the Yorktown, with three bombs that punched a hole in the deck, suffocated all but one of her boilers, and destroyed one anti-aircraft station. Sailors described it as an incomparable inspiration, notably Ensign John d'Arc Lorenz. This raid claimed the lives of thirteen Japanese dive bombers and three escorting fighters. After being damaged attacking some of Enterprise's SBDs returning from their attack on the Japanese carriers, two escorting fighters turned back early. Hiryū's second invasion wave, consisting of ten B5Ns and six escorting A6Ms, landed over Yorktown an hour later; the Japanese pilots assumed Yorktown was a separate, undamaged carrier because the repair work had been so successful. Nevertheless, they launched an attack and crippled Yorktown with two torpedoes.
Enterprise launched a last raid of 24 dive bombers, counting four SBDs from VB-6, six SBDs from VS-6, and 14 SBDs from Yorktown's VB-3, after a Yorktown scout aircraft discovered Hiryū late in the afternoon. Hornet's strike, which was delayed due to a communications fault, targeted the remaining escort ships but failed to hit them. Dusty Kleiss, an Enterprise dive bomber, hit the Hiryū on the front, disabling it so severely that it put the carrier out of operation right away, with Dusty comparing his damage to a taco being folded over.
The majority of the crew on Hiryū was evacuated after failed attempts to put out the fire, and the rest of the fleet kept sailing northeast to intercept the American carriers. He had sustained to close with Nagumo throughout the day and persisted as darkness fell to support his pilots, who had launched at extreme range.
Finally, dreading a night encounter with Japanese surface forces and assuming Yamamoto still meant to invade, Spruance reversed course and withdrew to the east, heading back west towards the enemy at midnight, based in part on a bogus contact report from the submarine Tambor. Yamamoto, for one, initially opted to keep fighting and pushed his remaining surface troops eastward in search of the American carriers. However, because Spruance had elected to withdraw eastward briefly, the Japanese surface troops could not make touch with the Americans, and Yamamoto ordered a general pullback to the west. It was prosperous for the United States that Spruance did not pursue Yamamoto's big ships, including Yamato, in the dark, since given the Japanese Navy's supremacy in night-attack tactics at the time, his cruisers would almost certainly have been swamped and his carriers sunk.
Despite repeated searches, Spruance was unable to re-establish touch with Yamamoto's men on 5 June. Despite Murphy's efforts to dampen its influence, one hundred miles west of Midway delivered the second of the submarine force's two critical contributions to the battle's result. Although Murphy and his executive officer, Edward Spruance, son of Admiral Spruance, saw multiple ships, they could not identify them. Former submarine commander Spruance was justifiably enraged by Murphy's report's ambiguity, leaving him with little more than suspicion and no firm evidence on which to base his plans.
Without knowing where Yamamoto's "Main Body" was, which had been a concern since the PBYs first saw the Japanese, Spruance was compelled to presume the "four enormous ships" described by Tambor were the main invasion force and went to block it while staying within 100 nautical miles. These ships got Yamamoto's order to retire at 02:55 and adjusted course accordingly. Unfortunately, Tambor was detected about the same time as this change of course, and the heavy cruisers Mogami and Mikuma collided during manoeuvres to escape a submarine attack, causing significant damage to Mogami's bow.
Spruance had Murphy reassured of duty and reallocated to a shore station as soon as Tambor returned to port, citing his muddled contact report, poor torpedo shooting during his attack run, and general lack of aggression, especially when compared to Nautilus, the oldest of the 12 boats at Midway and the only one to have successfully placed a torpedo on target. Several raids were made against the stragglers over the next two days, first from Midway and then Spruance's carriers.
Japanese and U.S. Casualties
SBD for Business Norman "Dusty" Kleiss, a fearless dive bomber pilot who counted three hits on Japanese ships during the Battle of Midway. The fleet learned its lessons from the Marshalls, Wake, and Marcus experiences. Seven hundred casualties and Mogami badly damaged 21 were damaged during the air attacks that sank Mikuma and caused further damage to Mogami. Hiryū: 392 (counting Rear Admiral Tamon Yamaguchi, who selected to go down with his ship); Soryū: 711 (counting Captain Yanagimoto, who decided to stay on board); 700 casualties and Mogami badly damaged 21 were both injured during the air attacks that sank Mikuma and caused further damage to Mogami. The remaining 23 casualties were on board the destroyers Tanikaze (11), Arashi (1), Kazagumo (1), and the fleet oiler Akebono Maru (10)
The carrier Yorktown and a destroyer, Hammann, were lost by the U.S. at the end of the conflict. Major General Clarence L. Tinker, Commander of 7th Air Force, who personally led a bomber strike from Hawaii on retreating Japanese forces on 7 June, was among the 307 Americans killed.
Even if they had achieved to catch them during the day, they were unlikely to be helpful in an airstrike against the Japanese battleships. Spruance's destroyers were also running out of fuel at this point. The Imperial Japanese Navy presented an imperfect picture of the battle results to the military liaison meeting on 10 June. One of the more surprising findings is a statement on the Mobile Force Commander's (Nagumo's) estimates: "The enemy is not informed of our intentions (we were not detected till the morning hours of the 5th at the earliest)." In actuality, American code-breaking attempts had undermined the entire operation from the start.
Moreover, the scale of the defeat was kept hidden from the Japanese populace and much of the military command structure. Nevertheless, the news in Japan reported a considerable triumph. As a result, even the Imperial Japanese Army (IJA) continued to assume that the fleet was in fine shape for at least a short period.
The injured were instantly transferred to naval hospitals upon the return of the Japanese fleet to Hashirajima on 14 June; the majority were categorised as secret patients, located in distinct wards, and isolated from other patients and their own families to keep this significant defeat hidden. The remaining officers and men were promptly dispersed to other fleet units and transferred to troops in the South Pacific, where the bulk died in action. They were not allowed to visit their families or friends. The Combined Fleet's flag commanders and staff were not punished, and Nagumo was later appointed commander of the rebuilt carrier force. As a result of the defeat, new measures were implemented, such as refuelling and re-arming more Japanese aircraft on the flight deck rather than in hangars and emptying unused fuel lines.
American Prisoners
Ensign Wesley Osmus, a pilot from Yorktown, Ensign Frank O'Flaherty, a pilot from Enterprise, and Aviation Machinist's Mate Bruno Peter Gaido, O'Flaherty's radioman-gunner, were all taken during the combat. Osmus was imprisoned on the ship Arashi, while O'Flaherty and Gaido were held on the cruiser Nagara. O'Flaherty and Gaido were interrogated before being executed by being chained to kerosene cans filled with water and tossed overboard to die. Osmus was destined for the same fate, but he resisted and was killed with a fire axe on the Arashi, his body being thrown overboard. According to Nagumo's report, Osmus died on 6 June and was buried at sea; O'Flaherty and Gaido's fortunes were not stated in Nagumo's report. Arashi's commander, Watanabe Yasumasa, has ordered Osmus's execution in this manner. Yasumasa expired when the destroyer Numakaze sank in December 1943, yet he would have been convicted as a war criminal if he had lived.
Japanese Prisoners
On 9 June, the USS Trout rescued two enlisted men from Mikuma from a life raft and transported them to Pearl Harbor. Following medical treatment, at least one of these sailors participated and offered intelligence during interrogation. After being detected by an American search plane, another 35 crew members from the Hiryū were rescued from a lifeboat by the USS Ballard on 19 June. They were transported to Midway and Pearl Harbor aboard the USS Sirius.
At the inauguration of the Pacific War, the Japanese navy had 2,000 carrier-qualified aircrews. The loss of four large fleet carriers, as well as over 40% of the carriers' highly trained aircraft mechanics and technicians, as well as the essential flight-deck crews and armourers, as well as the loss of organisational knowledge embodied in such highly trained crews, were still devastating blows to Japan's carrier fleet. The Imperial Japanese Navy Air Service suffered similar casualty rates in the Battles of the Eastern Solomons and the Combat of the Santa Cruz Islands a few months after Midway, and it was these battles, combined with the Solomons campaign's constant attrition of veterans, that triggered the sharp decline in operational capability.
Shōkaku and Zuikaku were the only significant carriers of the original Pearl Harbor assault force that remained afloat after the conflict. Ryūjō and Zuihō were light carriers, whereas Jun'yō and Hiyō were second-rate ships with limited efficacy, although being nominally categorised as fleet carriers. The U.S. Navy commissioned extra than two dozen fleet and light fleet carriers and numerous escort ships in the time it took Japan to build three carriers. The United States had been three years into a shipbuilding program mandated by the Second Vinson Act of 1938 when 1942 arrived.
Both the U.S. and Japan expedited flight crew training, but the U.S. had a more efficient pilot rotation policy, which intended that more soldiers survived and went on to training or command billets, where they could pass on lessons learned in combat to trainees, rather than staying in war, where mistakes were more likely to be fatal. Moreover, the Japanese had nearly rebuilt their carrier forces in terms of numbers by the Battle of the Philippine Sea in June 1944. Still, their planes, many of which were antiquated, were flown mainly by inexperienced and poorly trained pilots. In addition, Midway demonstrated the value of Navy cryptanalysis and intelligence gathering before the war.
Robert Ballard and a team of experts and Midway veterans from both sides discovered and photographed Yorktown on 19 May 1998, at a depth of 16,650 feet. Much of the original equipment, including the paint scheme, could still be seen. But, unfortunately, Ballard's search for the Japanese carriers that followed was fruitless.
In September 1999, a joint expedition was launched between Nauticos Corp. and the U.S. Navy. The mission discovered a big piece of wreckage, later confirmed as having come from the upper hangar deck of Kaga, using advanced renavigation techniques in conjunction with the ship's log of the submarine USS Nautilus. The research vessel R.V. Petrel crew reported on 18 October 2019 that it had discovered the Japanese carrier Kaga resting 5.4 kilometres beneath the seas, collaborating with the U.S. Navy. On 21 October 2019, the crew of the Petrel confirmed the existence of another Japanese carrier, the Akagi. The Akagi was discovered in the Papahānaumokuākea Marine National Monument, more than 1,300 miles northwest of Pearl Harbor, in nearly 18,000 feet of water.
In 1949, Chicago Municipal Airport was renamed Chicago Midway International Airport or simply Midway Airport to recognise the battle, which was crucial to the military effort during WWII. Waldron Field, an outlying training landing strip at Corpus Christi NAS, was named after John C. Waldron, as was Waldron Road, which leads to the strip. On 10 October 1944, she was renamed St. Lo to avoid confusion with the USS Midway (CV-41), a massive fleet aircraft carrier that was commissioned on 10 September 1945, eight days after the Japanese surrender, and is currently stationed in San Diego, California, as the USS Midway Museum.
Secretary of the Interior Bruce Babbitt declared the Battle of Midway National Memorial on the lands and seas of Midway Atoll National Wildlife Refuge on 13 September 2000. Tinker Air Force Base, located outside of Oklahoma City, is named after Major General Clarence L. Tinker and the eight-minute documentary Torpedo Squadron 8, which tells the USS Hornet's Torpedo story Squadron 8. During the Japanese attack on Midway Atoll's power plant at Sand Island, Ford, a Navy Reserve Commander at the time, was present and filmed it. Unfortunately, during the filming, he got fighting wounds in his arm from enemy fire.

December 27, 2022
January 11, 2023

December 20, 2022

January 19, 2023
 Unveiling the Viking Legacy in North America: A Journey Beyond Myth and Legend
 Spies in the Shadows: Unveiling Cold War Espionage Tales
 Empires of Splendor: Exploring the Rich Cultures and Mighty Rulers of African Kingdoms
 Exploring the Byzantine Empire: A Melting Pot of Ancient Cultures
 The 2007 Battle of Gaza: A Turning Point in Palestinian Politics
 The 2001 Kandahar Bombings: A Key Chapter in the U.S. Military Operations in Afghanistan
 Exploring the Ming Dynasty: A Peak Era in Chinese History
 Understanding Forex Trading: A Beginner's Guide
 Emerging Trends Shaping the Future of Freelancing
 Smart Money Management: Teaching Financial Literacy to Children
 In-Depth Review of "One Hundred Years of Solitude" by Gabriel García Márquez
 Explore the Magic of London with "The Peter Grant Series" by Ben Aaronovitch - A Comprehensive Review
 Unveiling the Depths of The Demon Cycle Series by Peter V. Brett: A Comprehensive Review
 Exploring the Depths of Science Fiction: A Review of The Hyperion Cantos by Dan Simmons
 Uncovering the Truth: The U.S. Invasion of Iraq in 2003 and the Hunt for WMDs
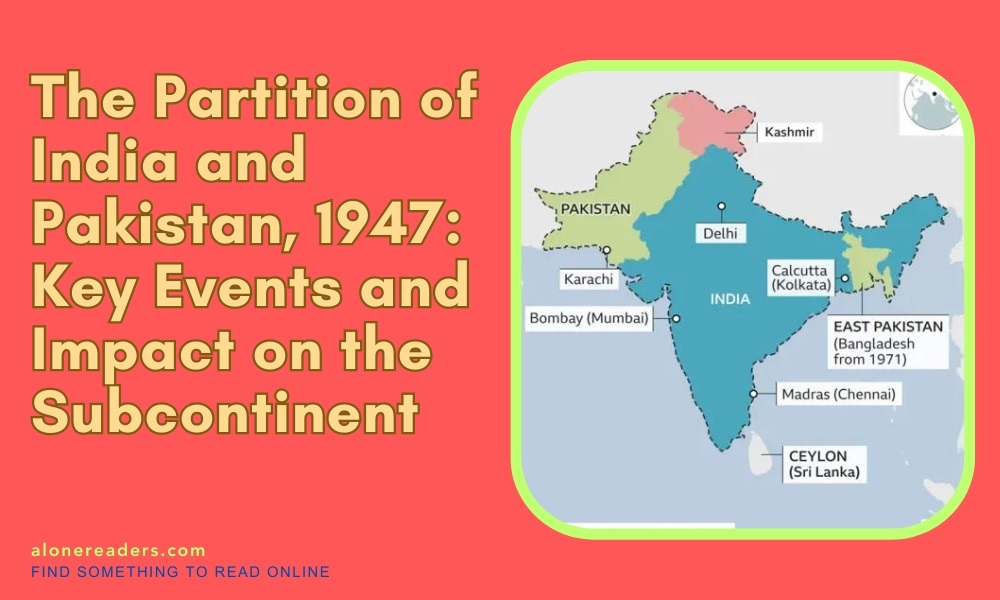 The Partition of India and Pakistan, 1947: Key Events and Impact on the Subcontinent