By now we’re all familiar with the basics of smartphone photography: You pull out your phone and push a button. But if you really plan to preserve those memories for posterity, then you’ll want your phone snaps to look their best. So up your phone photo game with these nine tips and tricks.
Camera settings, lighting, scene modes, and composition can all play a part, as we’ll explain. And when you’ve got your photos looking suitably fantastic, make sure you also take the time to back them up somewhere safe.
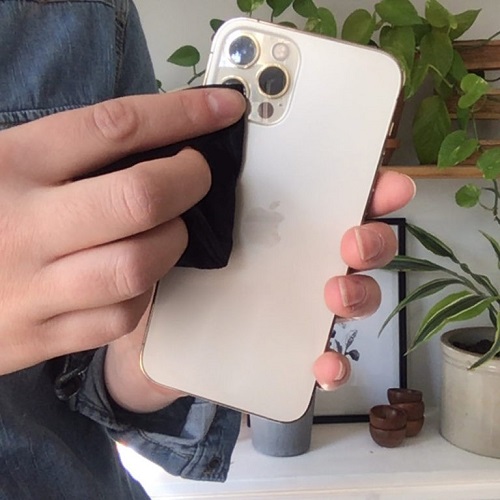
Photo file: unsplash.com
Smartphone cameras are more portable than photojournalist cameras, but they lack protection. When you're out, your phone is in your pocket or purse. The camera lens collects dust and lint. Before snapping a snapshot, wipe the lens with a napkin. Making sure the lens is clean before shooting a photo might save you from having to start again.

Photo file: unsplash.com
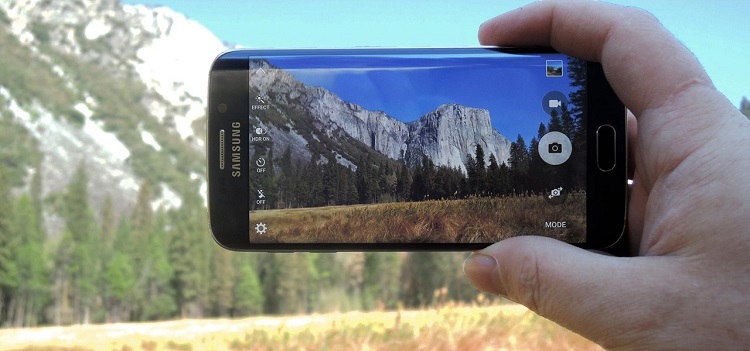
Smartphone cameras are less sensitive to movement than specialized cameras. A tiny shake may make a smartphone shot appear like it was taken on a rocking boat, but a DSLR does better.
Therefore, reduce camera shaking. You can buy inexpensive, compact smartphone tripods. Use a wall, a friend's shoulder, or your other arm instead of a tripod. In low light, when exposure periods are greater, shot steadiness is crucial.
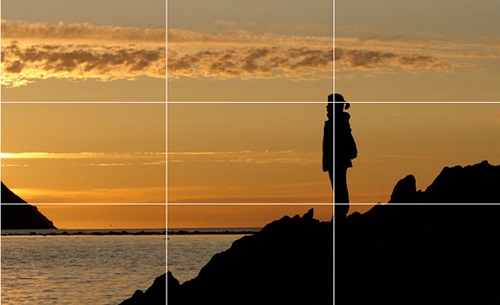
Photo file: bhphotovideo.com
That superimposes lines on your smartphone's camera screen based on the "rule of thirds" - a composition theory that dictates a picture should be divided into thirds horizontally and vertically, for nine parts total. If you arrange areas of interest at intersections or along lines, your shot will be more balanced, level, and enable viewers to engage with it organically.
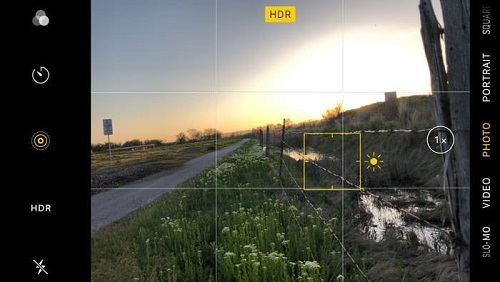
Photo file: unsplash.com
Most smartphone cameras now let you adjust focus and exposure. If manual focus is available, you touch the screen to activate it.
Check the camera app's settings. Face recognition will automatically focus on faces, preventing blurry photos of your buddies. The exposure controls how much light enters the picture. Tap once to focus, then hold and drag to adjust exposure in the iPhone camera app (above). The native Android camera app is similar: Tap once to focus, then use the slider to adjust exposure.
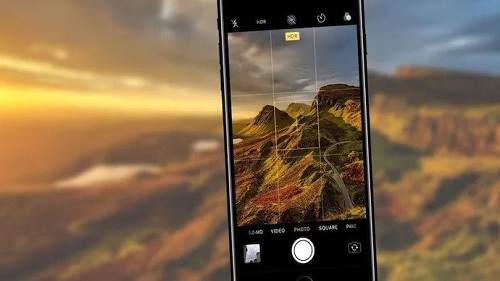
Photo file: unsplash.com
It may give photographs a creative or artistic air, but it's most often employed to create realistic images. Smartphone cameras have trouble balancing light and dark regions. You may photograph someone in the shadows against a bright backdrop or in low light against a bright wall. Exposing for the backdrop might underexpose the subject. Exposing for the topic might overexpose the backdrop. HDR avoids this by preserving shadow and highlight information. iPhones automatically capture HDR photographs. Manually modify HDR settings on android phones.
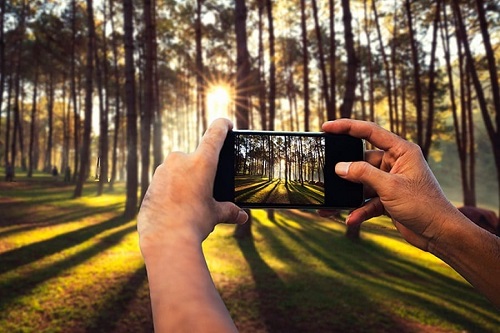
Photo file: unsplash.com
It's hard to find a good smartphone photo that was taken with a flash. Most of the time, they make a photo look like it has too much light, which changes the colors and makes people look washed out. Even when it's dark, use any natural sources of light you can find. This lets you play with shadows, like in the second picture below, or make a silhouette with other sources of light, like traffic and buildings nearby.
Play around with the "Exposure" tool in your favorite photo editing app after you've taken the picture to see if you can make it a little brighter without making it too grainy.

Photo file: unsplash.com
Some of the best photos only have one interesting thing in them. So, if you want to take a picture of one, you should take a little extra time to set up the shot. Some professional photographers say that the subject shouldn't fill the whole frame and that two-thirds of the photo should be empty space. This helps the subject stand out even more. But make sure you tap the screen of your smartphone to focus the camera on your subject. This will help make sure it's in focus and the lighting is good.
Pro Tip: Once you've taken your photo, you can use filters and apps to make the subject even more vivid or crop it to frame the subject correctly. You can also change the brightness, contrast, and saturation of the photo, all from your phone.
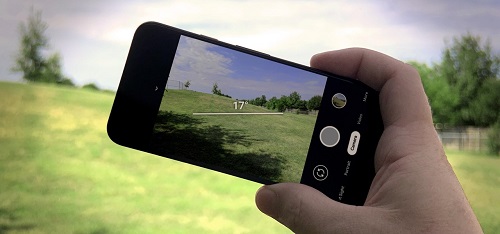
Photo file: unsplash.com
Taking photos from a unique or unexpected angle can make them more memorable. This is because it gives the impression that the subjects are deeper or taller than they really are. It also makes the picture stand out, since most photos taken with phones are either straight on or from above. Try taking a picture straight up and using the sky as empty space, like the first picture below. Or, try taking it at a slight downward angle.
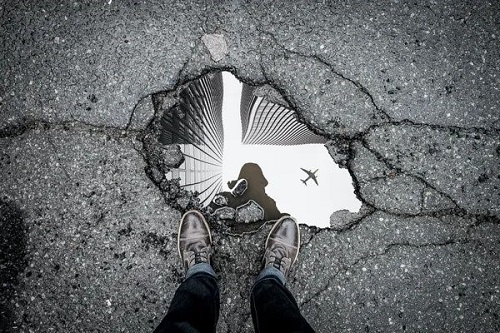
Photo file: unsplash.com
The sight of the sky reflected in a body of water has always struck me as particularly picturesque. Our eyes are naturally attracted to reflections, which is one of the reasons why we like seeing things like that so much. Therefore, search for picture situations in which you may interact with them. Reflections may be found in a wide variety of unexpected settings, including puddles, bigger bodies of water, mirrors, eyeglasses, drinking glasses, and metallic surfaces, to name just a few.

Photo file: unsplash.com
There are certain photographs that have a line that directs the attention of the viewer to a particular portion of the picture frame. These lines are referred to as leading lines. Consider stairways, building facades, railroad lines, roadways, or even a walk through the woods; they may be linear or curved in their configuration. Even if you simply managed to stumble across a very interesting form by chance, adding leading lines to your shot may make it appear like it was carefully planned.
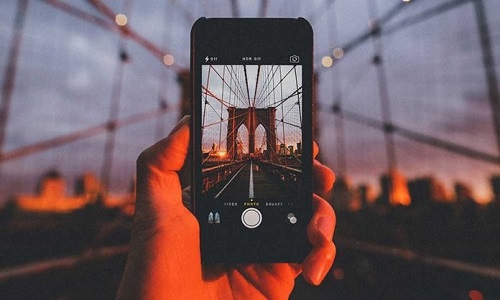
Photo file: unsplash.com
"A vague sense of beautiful proportion and balance" is one way to describe symmetry. And photos with symmetry can be very pleasing to look at. It's also one of the easiest and most interesting ways to put together a picture. When it comes to photography, symmetry usually means making an image that can be split into two parts that are the same size and are mirror images of each other. That's a little different from reflections. Symmetry can be found "in the wild," like in the picture of the stairs, or you can set up your photo to be symmetrical, like photographer Eric Christian did in the first photo below.
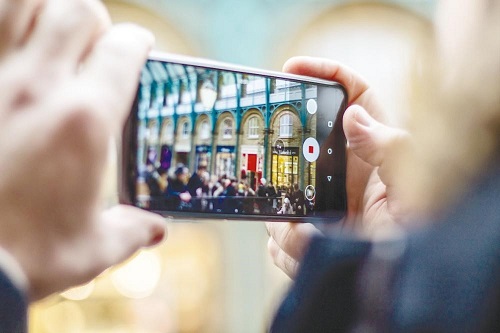
Photo file: unsplash.com
Repetitive patterns are very pleasing to the eye. They happen when strong graphic elements like lines, geometric shapes, forms, and colors are used over and over again. These patterns can be very striking, and just taking a picture of something like a beautiful tiled floor can be enough to make an image that stands out. Sometimes it's more fun to look for places where they show up naturally or by accident, like with the fire escapes on the left that are the same.

Photo file: unsplash.com
When you take a picture from far away, it's tempting to zoom in on a specific thing you want to capture. But it's better not to zoom in because doing so can make the photo look grainy, blurry, or full of pixels.
Instead, try to get closer to your subject, unless it's a wild animal, in which case you should keep your distance, or take the photo from the default distance and crop it later. So, you won't lose quality, and it's easier to play with or optimize a larger image.

Photo file: unsplash.com
"It's the little things" is a phrase you may have heard. Sometimes, that can also be said about pictures. Images that show small, intricate, and delicate details up close can be very interesting to look at. Keep an eye out for textures and patterns like peeling paint, a gravel road, or a tiled tabletop.
Pro Tip: Use the "sharpen" tool in your favorite photo-editing app to bring out the details in your photo in a subtle way. You could also download the Camera+ app and use its Clarity filter, which is called the app's "secret sauce" because it makes almost any shot look like it was taken with a professional camera.

Photo file: unsplash.com
Flash may enhance photos, but seldom at night. Because dark photos contrast more with your phone's flash, it might seem intrusive and uneven. In well-lit areas, a flash helps soften shadows behind or under your subject. When framing your next photo, search for shadows on the ground or vertical surfaces. Activate your camera's flash if you notice any. Setting your phone's flash to "auto" won't eliminate shadows. When done, turn off the flash. When taking product photography, consider how flash may highlight or hide lines and details.
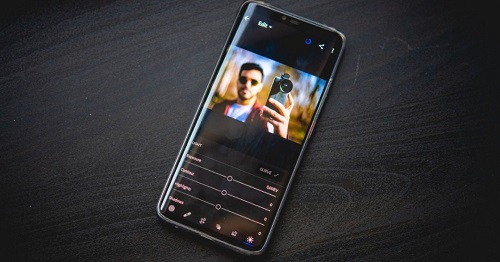
Photo file: unsplash.com
Just setting up and taking your smartphone photo isn't enough to make it look interesting. The next step, which is also a very important one, is to edit your photos. Filters are a useful tool for photography, especially for two goals:
- Getting rid of flaws in a picture and
- Making food look even tastier.
People often use beauty filters, and now the iPhone photos app has a lot of similar filters. There are also apps like Pho.to that can automatically fix photos of people's faces without much work. And what about those pictures of the food you eat every day? Foodie is one of the newest apps, and it comes with its own set of filters that are good for different kinds of food. But there are a lot of other great mobile apps for editing photos and videos.
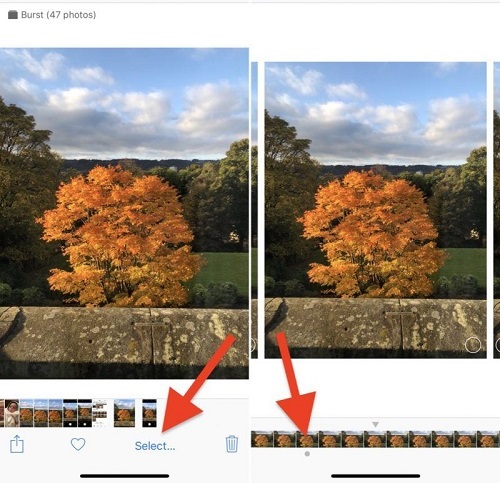
Photo file: macrumors.com
No longer do you have to wait for your film to be processed and developed before you can look at your pictures. Use the exciting new world of instant photography by taking as many pictures as you can. Then, after the event, you can go through your photos and delete all but the best ones.
Most phones have a burst mode that can be used for this. In Photo mode on both iOS and stock Android, you hold down the shutter button to turn it on. You can change how burst mode works by going into the camera's settings. A burst mode is often available in third-party camera apps as well. It gives you a good selection of pictures to choose from and can be useful in almost any situation, from casual family photos with your cousin who blinks a lot to photos of wildlife.
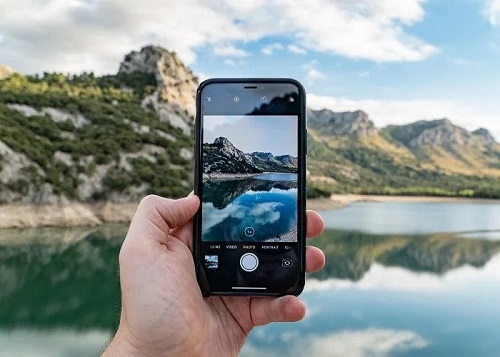
Photo file: unsplash.com
Even though there are many third-party camera applications, it's worth examining your phone's native app. iOS's built-in camera offers real-time filters (tap the icon in the top-right corner to see them). Swipe to Portrait mode on an iPhone 14 Plus for a depth-of-field effect (where the subject remains sharp but the background is blurred).
Android camera apps differ by vendor. The thermometer icon in Google Camera offers a lighting filter. Choose from hazy and tungsten settings to get the colors exactly right in any light. Samsung, LG, Sony, Huawei, and other camera applications add more sceneries and functions. On newer Samsung phones, you may hit the Mode button to access a Pro mode with filters and color and contrast tweaks. Explore your app.
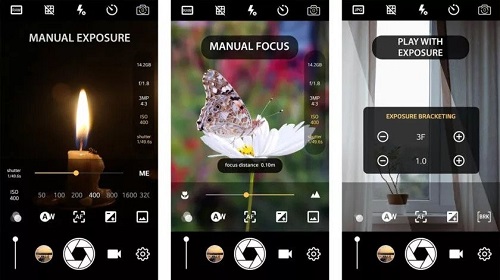
Photo file: unsplash.com
If you've never used a third-party camera app, you may be startled by the options. They provide more options, tools, and effects to improve smartphone images. Manual for iOS controls shutter speed, ISO, white balance, and more. Afterlight for iOS and Android has identical pro tools and filters.
Instagram (above) isn't simply a social network. It may also convert mediocre images into masterpieces. The program now incorporates editing and adjusting features, making it one of the greatest photo-taking applications available.

December 27, 2022

January 11, 2023


December 20, 2022

January 19, 2023
 Quantum Computing: Unleashing the Future of Technology
 Navigating the Impact of Tech Giants on the Global Economy
 Tech Giants and Startup Acquisitions: A Comprehensive Insight into Frequency and Motivations
 2024's Powerhouses: Ranking the Top 5 Supercomputers Globally
 Unveiling the Power Consumption of the World's Largest Data Centers: Insights into Cost, Ownership, and Locations
 Exploring the Reach and Impact of Donald Trump's Truth Social in 2024
 Maximize Your Journeys: Top Credit Cards for Earning Travel Rewards in 2024
 Experience the Best of Las Vegas: Your Ultimate Weekend Getaway Guide
 Staying Healthy on the Go: Essential Tips for Travel Wellness
 Essential Packing Guide for Business Travelers
 Embracing the Art of Slow Reading in Today’s Rapidly Changing World
 Review of "One Night Before The Royal Wedding" by Sharon Kendrick
 Exploring the Depths of Memory: A Review of "In Search of Lost Time" by Marcel Proust
 Exploring the Depths of the Universe: A Review of "The Remembrance of Earth’s Past" by Cixin Liu
 Navigating Australian Import Rules for Reconditioned Cars from Japan
 Essential Guide to Checking the Transmission of a Used Car