
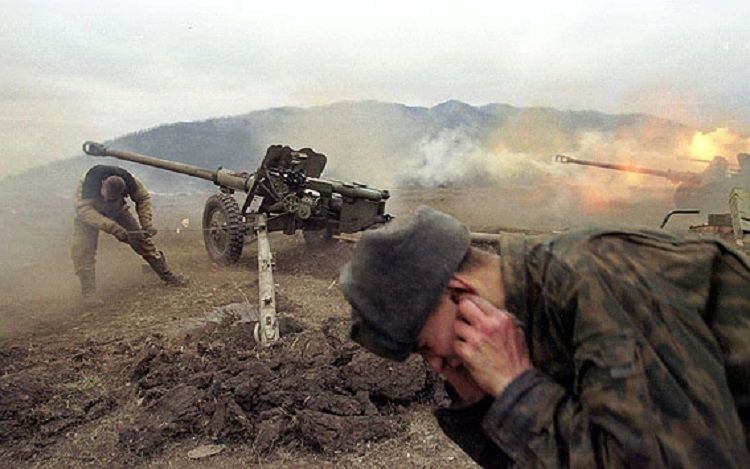
The Second Battle of El Alamein was occurred near the Egyptian railway station of El Alamein during World War II. The Axis' advance into Egypt was halted by the First Battle of El Alamein and the Battle of Alam el Halfa. General Claude Auchinleck was ousted as Commander-in-Chief Middle East Command in August 1942. His successor, Lieutenant-General William Gott, was killed while on his way to take his place as commander of the Eighth Army.
Lieutenant-General Bernard Montgomery headed the Eighth Army offensive. The British victory signalled the conclusion of the Western Desert Campaign, putting an end to the Suez Canal, the Axis threat to Egypt, and the Middle East and Persian oil fields. The battle boosted the Allies' morale, as it was their first significant victory over the Axis since Operation Crusader in late 1941. The fight took place on the same day as the Allied invasion of French North Africa in Operation Torch, which opened up a second front in North Africa on 8 November.
Panzer Army Africa made up of German and Italian tanks and infantry divisions had marched into Egypt following its victory at the Battle of Gazala, from 26 May to 21 June 1942. However, the Axis offensive in the First Battle of El Alamein (July 1–27) was repulsed.
In July, counterattacks by the Eighth Army were equally unsuccessful, as the Axis forces dug in and regrouped. The attack was led by the Afrika Korps' two armoured divisions and Panzerarmee Afrika's reconnaissance units. Still, the Axis forces were revolted at the Alam el Halfa ridge and Point 102 on 30 August 1942 throughout the Battle of Alam el Halfa, and the Axis forces were forced to retreat to their starting lines. When the Australian 9th Division seized the German 621st Signal Battalion in July 1942, suspicions that the American code had been cracked were confirmed.
Ultra and local sources uncovered the Axis order of battle, supply situation, and plans, giving the British the intelligence advantage. In July, a reorganisation of military intelligence in Africa increased information integration from all sources and its dissemination speed. Intelligence identified supply ships bound for North Africa, their location or path, and, in most cases, their payloads, allowing them to be targeted. Panzerarmee Afrika was down to three days' worth of fuel by 25 October, with only two days' worth east of Tobruk. They lacked the operational flexibility of critical movement, given that the British onslaught could begin at any time. The scarcity of ammunition was considerably alleviated by submarine and air supplies, and by late October, there was a sixteen-day supply at the front. The Eighth Army was ready after six weeks.
British Plan
Montgomery's strategy was for the main attack to the north of the line and a secondary attack to the south, with XXX Corps and XIII Corps leading the way, with X Corps exploiting the success. Montgomery hoped to cut two routes through the Axis minefields in the north with Operation Lightfoot. The break-in, the dogfight, and the eventual breaking of the enemy were all part of Montgomery's 12-day combat plan.
Montgomery planned for four infantry divisions of the XXX Corps to push over a 16-mile front to the Oxalic Line on the first night of the operation, overrunning the advanced Axis defences. Next, the British tanks would proceed to Skinflint, deep within the Axis defensive system, astride the north-south Rahman Track to take on the Axis armour. Then, as the Eighth Army infantry "crumbled" the deep Axis defensive bunkers and destroyed any tanks that attacked them, the infantry combat would continue.
Before the conflict, Commonwealth forces used Operation Bertram to deceive the Axis command as to where and when the action would occur. By changing garbage with ammunition, gas, and rations at night, the Eighth Army built up supplies in the front area unseen by the Axis. In addition, a dummy pipeline was erected in the hopes of fooling the Axis into thinking the attack would happen much later and far further south than it did. Finally, on September 29/30, the 131st Infantry Brigade of the 44th Infantry Division launched Operation Braganza against the 185th Paratroopers Division "Folgore" in an attempt to conquer the Deir el Munassib area, assisted by tanks from the 4th Armoured Brigade.
Axis Plan
Before leaving for Germany on 23 September, Rommel organised the defence and submitted a comprehensive assessment of the situation to Oberkommando der Wehrmacht, reiterating the Panzer Army's critical requirements. Rommel was well aware that the British and Commonwealth forces would shortly attack. Therefore, Rommel planned to persuade OKW to strengthen his forces for Panzerarmee Afrika and the German army fighting in southern Russia to eventually join forces and destroy the British and Commonwealth armies in North Africa and the Middle East.
Meanwhile, the Panzerarmee dug in and awaited the Eighth Army's offensive or the Red Army's loss at Stalingrad. Because the British deception perplexed the Axis as to the point of attack, Rommel broke from his usual practice of keeping his armoured strength in a concentrated reserve and divided it into two groups, individually organised into battle groups, to be able to make a rapid armoured interference wherever the blow fell and avoid thin breakthroughs from widening. One hundred twenty-five operational tanks in the 15th Panzer Division and 121 active combat vehicles in the 21st Panzer Division.
The 90th Light Division was pushed back, and the 101st Motorised Division "Trieste" was held in reserve near the coast. Rommel planned to move his soldiers faster than the Allies to concentrate his defences at the most strategic place. Still, a scarcity of gasoline meant that once the Panzerarmee had focused, it would be unable to move again. Moreover, the British were well recognised that Rommel would not mount a defence using his typical manoeuvre tactics. Still, there was no clear vision of how he would fight the battle, and British preparations severely underestimated Axis defences and Panzerarmee combat power.
Phase One: The Break-in
Only approximately half of the soldiers made it to their objectives, and no tanks made it through. On the left flank of XXX Corps, the 1st South African Division assaulted on a two-brigade front to secure Miteirya Ridge's southern end, with the 3rd South African Infantry Brigade on the left and the 2nd South African Infantry Brigade on the right. The main attack's goal was to break through, involve, and pin down the 21st Panzer Division and the 132nd Armored Division "Ariete" round Jebel Kalakh. At the same time, the Free French on the extreme left were tasked with securing Qaret el Himeimat and the el Taqa plateau. The 44th Infantry Division's 131st Infantry Brigade safeguards the attack's right flank. The 185th Infantry Division "Folgore," portion of the Ramcke Parachute Brigade and Gruppe Keil, fought back obstinately.
The minefields were more profound than expected, and Axis defence fire made clearing roads through them difficult. Paths through the second minefield had still not been cleared by daybreak on 24 October, allowing the 22nd and 4th Light Armoured Brigades to make their intended turn north towards the rear of enemy positions 5 miles west of Deir el Munassib. The 50th (Northumbrian) Infantry Division, farther north along the XIII Corps front, had a limited and costly victory against the 17th Infantry Division "Pavia," the 27th Infantry Division "Brescia," and portions of the 185th Infantry Division "Folgore." On the left of the XXX Corps front at Ruweisat Ridge, the 4th Indian Infantry Division staged a simulated attack and two small raids to divert attention away from the front.
Phase Two: The Crumbling
Aerial reconnaissance at dawn revealed little change in Axis formations. Therefore Montgomery ordered that the northern passage be cleared and the New Zealand Division, backed up by the 10th Armoured Division, be pushed southern from Miteirya Point. The 9th Australian Division in the north must organise a crumbling operation for that night. At the similar time, the 7th Armoured Division in the south should keep trying to break through the minefields with help from the 44th Division if necessary. Panzer battalions launched a counter-offensive just after daybreak against the 51st Highland Division, only to be stopped dead in their tracks.
The German headquarters suffered a major setback on Saturday, 24 October. At the Oxalic Line, the armour was kept. Artillery and the Desert Air Force bombed Axis positions all day, flying approximately 1,000 flights to aid in the 'crumbling' of the Axis forces. There had been little progress by 16:00. Axis tanks from the Italian 133rd Armored Division and the 15th Panzer Division "Littorio" swung out from the Kidney feature, also recognized to the Germans and Italians as Hill 28, to engage the 1st Armoured Division at dusk, with the sun at their backs, and the first extensive tank engagement of El Alamein began. Montgomery overruled Lumsden's request to halt the attack. The 10th Armoured Division's attack from Miteirya Ridge that night failed. The 24th Armoured Brigade had moved forward and claimed to be on the Pierson Line at dawn, but it turned out that they had misplaced their position in the dust and confusion and were well short. The offensive in the XIII Corps area to the south did not go as planned.
Phase Three: The Counter
Panzerarmee Afrika had barely three days' worth of fuel. By this time, Rommel was confident that the main assault would come from the north, and he was determined to retake Point 29. Accordingly, he ordered a counter-offensive by the 15th Panzer Division and the 164th Light Division and a portion of the Italian XX Corps to begin at 15:00. Still, it was thwarted by relentless artillery and air attacks. This offensive, according to Rommel, was partially successful, with the Italians retaking part of Hill 28. Raids on Hill 28 were conducted by elements of the 15th Panzer Division, the Littorio, and a Bersaglieri Battalion, with all local artillery and AA supporting them. In the evening, a portion of the Bersaglieri Battalion successfully captured the hill's eastern and western sides.
The 2/17th Australian Battalion, which had been defending the area, was forced to retreat in large numbers. Rommel modified his armour distribution policy, sending the 90th Light Division and 21st Panzer Division north from Ed Daba and one-third of the Ariete Division and half of the weaponry from the southern area to join the 15th Panzer Division and the Littorio Division. Because of the fuel crisis, the decision could not be changed. The Trieste Division was dispatched from Fuka to Ed Daba to replace the 90th Light Division. Still, the 21st Panzer Division and the Ariete Division made poor progress under continual DAF bomber fire during the night. The British could not take advantage of the lack of tanks at the Kidney feature.
The 2nd Battalion, The Rifle Brigade, would attack Snipe at 23:00 on 26 October, while the 2nd Battalion, King's Royal Rifle Corps, would attack Woodcock. The plan was for the 2nd Armoured Brigade to pass north of Woodcock the following day and the 24th Armoured Brigade to cross south of Snipe. However, the 2nd Rifle Brigade had been more fortunate, and after following the supporting artillery's shell bursts, they dug in when they saw they had reached their objective with little resistance.
The 2nd Armoured Brigade began its advance at 6:00 a.m. but was met with such fierce resistance that by midday, it had still to connect up with the KRRC. The two other battalions of the 133rd Lorried Brigade had proceeded on Snipe and dug in, only to discover that they had fallen far short of their objective the next day. The 90th Light Division's raid on Point 29 on the afternoon of 27 October failed due to heavy artillery and bombing, which broke off the attack before it could close with the Australians.
The 15th and 21st Panzer Regiments launched a concerted attack on the X Corps front on 28 October but were repulsed by artillery, tank, and anti-tank gunfire. The 133rd Brigade Lorried Infantry Brigade was sent forward late on 27 October to recover lost positions, but the next day, a large portion of this force was overrun by German and Italian tanks from the Littorio and the supporting 12th Bersaglieri Regiment; a third brigade attack on the salient from the south-east would then be launched.
The 20th Brigade breezed through its objectives, but the 26th Brigade struggled. In late October, the British still possessed 800 operational tanks by the end of these clashes. The Panzerarmee day statement for 28 October, intercepted and read by Eighth Army the same evening, recorded 81 operable German tanks and 197 Italian tanks. The tankers Proserpina carrying 4,500 tonnes of fuel and Tergestea carrying 1,000 tonnes of fuel and 1,000 tonnes of ammunition were sunk off the west coast of Greece by a torpedo from a Wellington bomber on 26 October, thanks to signals intelligence information. The tanker Luisiano taking 2,500 tonnes of fuel was sunk by a submarine from a Wellington bomber on 28 October. "It will be hard for us to disengage from the enemy," Rommel informed his superiors."
Phase Four: Operation Supercharge
The objective of this phase of the combat, which began at 01:00 on 2 November, was to destroy enemy armour, force the enemy to fight in the open, reduce the Axis stock of petrol, attack and occupy enemy supply routes, and cause the German army to disintegrate. The Division was to command the 151st Brigade from the 50th Infantry Division, the 152nd Brigade from the 51st Infantry Division, the 133rd Royal Sussex Lorried Infantry Brigade, and the 9th Armoured Brigade, in addition to the 5th New Zealand Infantry Brigade and 28th Infantry Battalion.
It was anticipated that two infantry brigades, each supported by a tank regiment, the 8th and 50th Royal Tank Regiments, would move and clear a passage through the minefield, similar to Operation Lightfoot. The 9th Armoured Brigade would pass through a gap in the Axis defences on and around the Rahman track, some 2,000 yards further forward, and the 1st Armoured Division, following behindhand, would go through into the open to take on Rommel's armoured reserves once they reached their objectives, which were 4,000 yards away. However, on 31 October, Rommel ordered the 21st Panzer Division off the front lines to establish a mobile counterattacking force. As a result, the Royal Dragoons armoured car unit could slip out into the open and spend the day assaulting the Axis communications after New Zealand engineers freed five lines through the mines.
The 9th Armoured Brigade began its approach march from El Alamein railway station at 20:00 on 1 November, with roughly 130 tanks, and only 94 runners arrived at the start line. The 2nd Armoured Brigade followed the 9th Armoured Brigade, and by mid-morning, the 8th Armoured Brigade had arrived on its left, with orders to advance to the southwest. During the day's fierce battle, British armour made a slight advance. At 11:00 on 2 November, the remnants of the 15th Panzer, 21st Panzer, and Littorio Armoured Divisions launched a counter-offensive against the 1st Armoured Division and the 9th Armoured Brigade, who had dug in with an anti-tank gun and artillery screen, as well as intensive air support. As a result, the Afrika Korps' tank strength fell by 70, and in addition to the 9th Armoured Brigade's losses, the 2nd and 8th Armoured Brigades each lost 14 tanks in action, with another 40 damaged or broken down. As a result, the armour orders were revised, and the 2nd Armoured Brigade was assigned to reinforce the 133rd Lorried Brigade's advanced unit, while the 8th Armoured Brigade was assigned to drive southwest.
Phase Five: The Break-out
The 2nd New Zealand Division was to march west along desert routes to the bluff above Fuka, almost 60 miles away, with two lorried infantry brigades, the 9th Armoured and 4th Light Armoured brigades under supervision. When it got dark, the Division was just 15 miles west of the Rahman track, with the 9th Armoured Brigade still there and the 6th New Zealand Brigade further back. The tripping of the 90th Light Division with the 1st and 7th Armoured Divisions failed miserably. Rommel ordered orders to retreat at 17:30, unwilling to wait any longer for a response from Hitler.
The majority of the Italian infantry formations were abandoned due to a lack of transport. Hitler's insistence that Rommel holds his ground ruined any hope of getting them away with an earlier manoeuvre, forcing him to retain the non-motorised Italian infantry far forward until it was too late. The 1st Armoured Division was moved to El Daba, 15 miles down the coast. The 7th Armoured Division was directed to Galal, another 24 kilometres west along the railway, to strengthen the armoured thrusts.
Analysis
Although Rommel did not abandon hope until the end of the Tunisia Campaign, the British win at El Alamein was a British victory. "It may almost be argued," Churchill added, "We had never won a battle before Alamein. We never lost another battle after Alamein ".
On several occasions, the Allies possessed numerical dominance in the Western Desert, but it had never been so complete in terms of number and quality. In the Western Desert, the Allies grew a inclusive advantage with the advent of Sherman tanks, 6-pounder anti-tank guns, and Spitfires. Montgomery envisioned the conflict as an attrition struggle akin to those fought during World War I. He correctly estimated the battle's length and the quantity of British and Commonwealth losses. In contrast to the Regia Aeronautica and Luftwaffe, which provided little or no help to ground forces, preferring to engage in air-to-air combat, British artillery was skillfully handled, and British air support was good. As a result, the fight was greatly influenced by air superiority. According to Montgomery, "The moral impact of air action is enormous, far outweighing the material destruction inflicted. In the opposite direction, the sight and sound of our air forces fighting the enemy have a similar satisfying effect on our men. The grouping of the two has a significant impact on the single most critical aspect in war morale."
Historians disagree over why Rommel opted to invade Egypt. Rommel had been informed by the German and Italian staff that his army could not be adequately supplied so far from the ports of Tripoli and Benghazi, according to Martin van Creveld in 1997. Nevertheless, Rommel continued his march on Alamein, and, as expected, supply problems restricted the axis troops' striking capabilities. Conferring to Maurice Remy (2002), Hitler and Mussolini exerted pressure on Rommel to advance. Rommel had been pessimistic since the First Battle of El Alamein, and he realised that the Axis was losing a race against time as US supplies were en way to Africa and Axis ships were sunk in the Mediterranean. On 27 August, Kesselring told Rommel that supplies would arrive on time, but Westphal countered that such a commitment was impossible and that the offensive should not commence until they did. Rommel made the hardest decision during a conversation with Kesselring on 30 August.
Casualties
The number of Axis prisoners had increased to 30,000 troops by 11 November. Fritz Bayerlein, using numbers from the Offizieller Bericht des Oberkommandos Afrika, assessed German losses in the battle to be 1,100 killed, 3,900 wounded, and 7,900 captives. In contrast, in a note to The Rommel Papers, Italian losses were 1,200 killed, 1,600 wounded, and 20,000 prisoners.
As per Italian official history, the Axis suffered 4,000 to 5,000 murdered or lost, 7,000 to 8,000 injured, and 17,000 prisoners during the combat, with 9,000 killed or lost, 15,000 injured, and 35,000 detainees during the retreat. Conferring to General Giuseppe Rizzo, Total Axis casualties included 25,000 personnel killed or injured, including 5,920 Italians, 30,000 prisoners, 510 tanks, 2,000 field guns, anti-tank guns, and anti-aircraft guns, 510 tanks, and 2,000 field guns, anti-tank guns, and anti-aircraft guns. In addition, there were 500 Axis tank losses.
Subsequent Operations
The Eighth Army was caught off guard by the Axis withdrawal. The resulting disarray caused by redeployments among the three corps caused them to be late in chase, failing to cut off Rommel at Fuka and Mersa Matruh. The Desert Air Force was unable to make every attempt to bomb a disorganised and withdrawing enemy that was within range and limited to the coast road on 5 November. The DAF was cautious on 5 November, reducing the number of offensive sorties to defend the Eighth Army due to supply constraints and the belief that the Luftwaffe was about to receive substantial reinforcements.
Since the Second Battle of Alamein, the Panzerarmee had lost around 75,000 troops, 1,000 guns, and 500 tanks and had withdrawn. The New Zealanders had reached the shoreline road by 15 December. Still, the challenging terrain allowed Rommel to divide his forces into smaller units and withdraw cross-country via the gaps between their positions. Rommel made a textbook withdrawal, destroying every equipment and infrastructure left behind and strewing mines and booby traps across the landscape behind him. The Eighth Army arrived at Sirte on 25 December but was obliged to wait for the harbour's west to assemble their dispersed units and plan an offensive at Wadi Zemzem, near Buerat, 230 miles east of Tripoli. In response to the Operation Torch landings, Rommel had requested the Italian Comando Supremo in Rome to retire to Tunisia, where the terrain would better suit a defensive action and where he could connect up with the Axis army gathering there.
The 51st Division launched a frontal assault on the Axis position on 15 January 1943, whereas 7th Armoured Division and 2nd New Zealand Division advanced around the inland flank. Rommel made a fighting retreat, weakened by the departure of the 21st Panzer Division to Tunisia to boost the 5th Panzer Army. As Rommel proceeded to withdraw to the Mareth Line, the French southern defensive position in Tunisia, the port of Tripoli, 150 miles west, was captured on 23 January.
Since shortly after Operation Torch, Rommel had been in contact with the Fifth Panzer Army, fighting against the multi-national First Army in northern Tunisia. Hitler was adamant about keeping Tunisia, and Rommel was finally receiving replacement forces and supplies. With the Eighth Army arriving from the east and the British, French, and Americans approaching from the west, the Axis faced two fronts. Rommel was given command of the new Army Group Africa, which was responsible for both fronts, and the German-Italian Panzer Army was renamed the Italian First Army. The 18th Army Group oversaw the two British armies. The failure of the First Army's Run for Tunis in December 1942 extended the North African war, which ended in May 1943 when the Italian-German troops in North Africa surrendered.

October 25, 2023

January 02, 2025
 The Division Between Pagan and Christian Rome: Unity or Fragmentation Before the Fall of the Western Roman Empire
 Religious Conflicts and the Rise of Christianity in Late Rome: Faith, Power, and the Fall of the Western Roman Empire
 The Loss of North Africa: Rome’s Economic Lifeline Destroyed and the Road to the Fall of the Western Roman Empire
 The Collapse of Roman Britain: How Rome's Withdrawal Reshaped Western Europe
 Vinland and North America: Leif Erikson’s Journey to the New World Explained
 Erik the Red and the Discovery of Greenland: Norse Exploration and Colonization
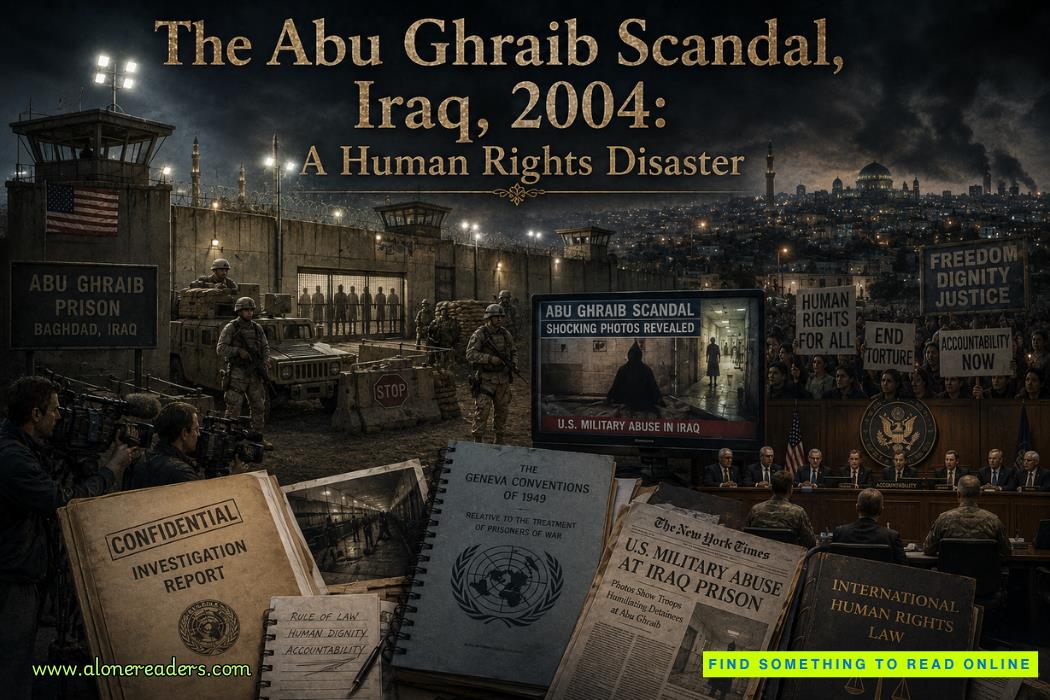 The Abu Ghraib Scandal, Iraq, 2004: A Human Rights Disaster That Shook the World
 The Disbanding of the CNRP, Cambodia, 2017: Hun Sen's Clampdown on Democracy and the Reshaping of Cambodian Politics
 The Firing of James Comey, United States, 2017: Trump's Controversial Decision Amid FBI Investigation
 The Rwandan Refugee Crisis, Central Africa, 1994: Aftermath of Genocide and the Humanitarian Catastrophe
 The Most Important Turning Points of the Battle of Hastings (1066)
 Why William Won the Battle of Hastings and Harold Lost: Strategy, Leadership and Fate in 1066
 How King Harold II Died: Facts, Myths, and Historical Debate
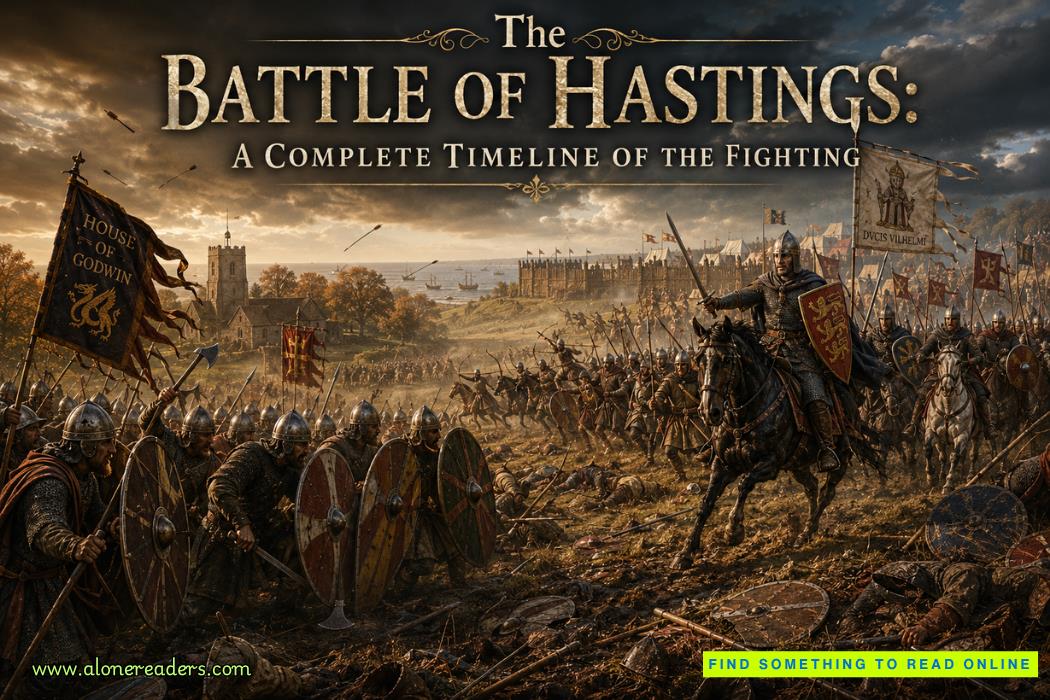 The Battle of Hastings: A Complete Timeline of the Fighting
 High-End Talent Category A Work Permit China 2026: Complete Eligibility, Benefits, Application Process, and Expert Guide
 Cultural Activities Visa Japan 2026 Guide: Complete Eligibility, Requirements, Application Process, and Expert Tips