
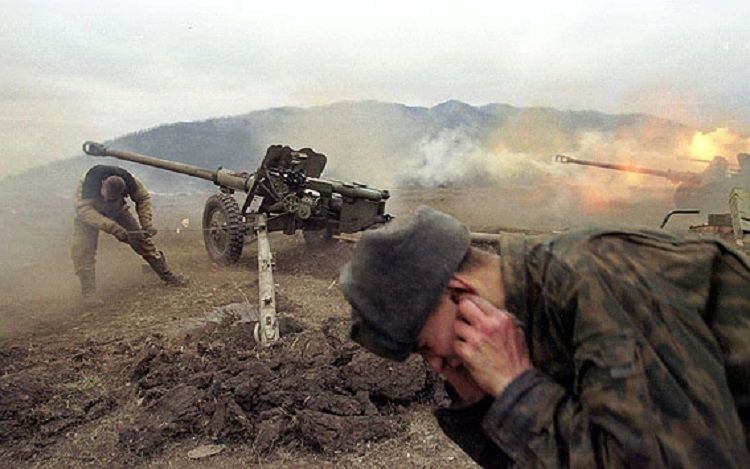
The First Battle of El Alamein was ended up fighting in Egypt among Allied British Imperial and Commonwealth forces (British India, Britain, Australia, South Africa, and New Zealand) of the Eighth Army and Axis powers (Italy and Germany) of the Panzer Army Africa, which included the Afrika Korps under Field Marshal Erwin Rommel.
The British stopped the Axis armies from advancing into Egypt a second time. The Axis fortifications in El Alamein, barely 66 miles from Alexandria, were dangerously close to Egypt's ports and towns, Commonwealth forces' base facilities, and the Suez Canal. However, despite time and distance limits, the Axis forces were too far away from their Libyan base to stay at El Alamein indefinitely, forcing both sides to stockpile supplies for future offensives.
Some of the countries held the war and the last clash of the same name in high regard. This is owing to New Zealand's significant contribution to the defence of El Alamein, particularly the heavy role played by the Mori Battalion. Since then, members of this unit have been hailed as war heroes, including Commander-in-chief James Henare, Frederick Baker, and Eruera Te Whiti o Rongomai Love, who was killed in battle.
Retreat from Gazala
The British Eighth Army, led by Lieutenant-General Neil Ritchie, had withdrawn east from the Gazala mark into north-western Egypt as far as Mersa Matruh, almost 100 miles inside the border, following their defeat at the Battle of Gazala in eastern Libya in June 1942. Ritchie had opted not to hold the Egyptian border defences because the defensive strategy was for infantry to hold fortified locations and a heavily armoured force to confront any efforts to infiltrate or outflank the permanent defences. However, the infantry positions would be defeated in detail because General Ritchie had absolutely no armoured units left fit to battle. The Mersa defence plan also comprised an armoured reserve. Still, Ritchie felt that he could organise his soldiers to protect the minefields between the defended settlements in its absence, preventing Axis engineers from gaining unhindered access.
To protect the Matruh lines, Ritchie stationed the 10th Indian Infantry Division in Matruh and the 50th Infantry Division in Gerawla, both under the command of X Corps HQ, which had recently reached from Syria. Internal from X Corps would be XIII Corps, which would have the 5th Indian Infantry Division around Sidi Hamza, about 20 miles inland. The newly arrived 2nd New Zealand Division, which was missing one brigade, the 6th, had been left out of combat if the division was captured. It would be required to serve as the nucleus of a new division at Minqar Qaim on the escarpment 30 miles inland, and 1st Ar The 4th and 22nd Armoured Brigades of the 7th Armored Division had been taken over by the 1st Armored Division, which had just three tank regiments between them at the time.
General Claude Auchinleck, Commanding officer Middle East Command, replaced Ritchie and took command of the Eighth Army on 25 June. He chose not to engage in a decisive battle at the Mersa Matruh position. He concluded that, as a result of his inferior armour following the Gazala debacle, he would be unable to prevent Rommel from bursting through his centre or encircling his exposed left flank to the south, as he had completed at Gazala. Instead, he used delaying tactics while retreating 100 miles or more east to a more secure spot near El Alamein on the Mediterranean shore. The steep hills of the Qattara Depression, only 40 miles south of El Alamein, ruled out Axis armour moving around the southern edge of his defences and limited the width of the front he had to defend.
Battle of Mersa Matruh
Auchinleck fought significant stalling operations while building the Alamein positions, first at Mersa Matruh on 26–27 June and then at Fuka on 28 June. Due to the late change of orders, the advanced formations were torn between the desire to inflict harm on the enemy and the need to avoid becoming stuck in the Matruh position and retreat in good order. As a result, there was a absence of coordination between the two front Corps and their forces. The German 21st Panzer Divisions and 90th Light finally made it through the minefields in the centre of the front on 26 June. The British 50th Division's artillery checked the 90th light and resumed its offensive early on 27 June. Simultaneously, the 15th and 21st Panzer Divisions moved east above and below the escarpment. The 4th Armoured and 7th Motor Brigades stopped the 15th Panzer, but the 21st Panzer was instructed to attack Minqar Qaim. Rommel ordered the 90th Light Division to resume its advance, to cut the coast road behind the 50th division by the evening. The 2nd New Zealand Division was encircled when the 21st Panzer marched on Minqar Qaim, but it broke out on the night of June 27/28 and withdrew east without suffering any severe losses.
Auchinleck had prepared a second holding point at Fuka, about 30 miles east of Matruh, and he gave the order to withdraw to Fuka at 21:20. However, the division was forced to retreat to the El Alamein position right away due to a communication breakdown. After deteriorating to safe a place on the bluff, X Corps was out of contact with Eighth Army from 19:30 till 04:30 the following day. It was only then that they realised the withdrawal order had been issued. The withdrawal of XIII Corps had exposed the southern flank of X Corps on the coast at Matruh, and the severing of the coastal road 17 miles east of Matruh had jeopardised their line of retreat. They were ordered to flee south into the desert and then return east. Auchinleck ordered the XIII Corps to assist, but they could not do so. On 28 June, at 21:00, X Corps organised into brigade groupings and marched south. As they came upon enemy units laagered for the night in the darkness, there was a lot of uncertainty. The 5th Indian Division, in particular, suffered tremendous casualties, with the 29th Indian Infantry Brigade being destroyed at Fuka. More than 6,000 prisoners were taken by Axis troops, 40 tanks and a massive amount of supplies.
Defences at El Alamein
Alamein was a small coastal railway station with no significance. The Ruweisat Ridge, a low stony eminence 10 miles to the south, provided superb sight for many miles over the surrounding desert, including the Qattara Depression, 20 miles to the south. The British selected to defend a line that ran between the sea and the Depression, meaning Rommel could only outflank it by taking a long detour to the south and traversing the Sahara Desert. Before the war, the British Army in Egypt recognised this and had the Eighth Army begin constructing multiple "boxes," the most developed around the Alamein railway station. However, the majority of the railway was a vast, barren desert. Lieutenant-General William Norrie took command of the situation and began erecting three defensive "boxes." The 1st South African Division had partially wired and mined the first and most substantial, at El Alamein on the shore. The Bab el Qattara box, located 20 miles from the coast and 8 miles southwest of the Ruweisat Ridge, had been excavated but not wired or mined. In contrast, the Naq Abu Dweis box, located 34 miles from the coast and on the edge of the Qattara Depression, had received very little attention.
The British stance in Egypt was precarious; the rout from Mersa Matruh had thrown the British headquarters in Cairo into disarray, which became known as "the Flap." Papers were rapidly destroyed at British bases, rear echelon units, and the British Embassy on what became known as "Ash Wednesday" in preparation for the city's capitulation. Auchinleck believed he could stop Rommel at Alamein, but he couldn't rule out the chance of being outmanoeuvred or outfought again. To keep his force alive, measures must be developed for a possible further retreat while maintaining morale and keeping the Egyptians' support and cooperation. Defensive fortifications were built west of Alexandria and on the approaches to Cairo, and the Nile delta was flooded in large areas. The Axis assumed Egypt would be captured soon, and Italian leader Benito Mussolini, seizing a historic opportunity, travelled to Libya to prepare for his triumphant entry into Cairo.
The dispersal of X Corps threw off Auchinleck's plan to capture the Alamein defences at Mersa Matruh. On 29 June, he ordered the 1st South African, 5th, and 10th Indian divisions of XXX Corps to take the coastal sector on the right of the front, and the 2nd New Zealand Division and 4th Indian divisions of XIII Corps to take the coastal area on the left. The 1st and the 7th Armoured Division's remnants were kept as a mobile army reserve. The fixed defensive positions were to channel and disorganise the enemy's approach, while mobility units attacked the flanks and rear.
Rommel's Panzerarmee Afrika neared the Alamein position on June 30. The Axis armies were depleted and outmanned. Nevertheless, Rommel had pushed them forward relentlessly, believing that if he struck fast enough before the Eighth Army could settle in, his momentum would carry him through the Alamein position and allow him to advance to the Nile with little resistance. Because the Axis staff had expected a six-week halt after the capture of Tobruk, supplies remained a concern. The RAF's all-out bombardment on the Axis supply lines, which, with the advent of United States Army Air Forces substantial bombers, could reach as far as Benghazi, was also exhausting German air units. Although acquired supplies proved essential, water and ammunition were always limited. Moreover, a lack of transportation made it difficult for the Axis troops to distribute their supplies.
Axis Strategy of Attack
Rommel's strategy was for the Afrika Korps' 90th Light Division and the 15th and 21st Panzer divisions to break through the Eighth Army defences between the Alamein box and Deir el Abyad, which he thought was well protected. The 90th Light Division was to next turn north to cut the shore highway and trap the guards of the Alamein box, which Rommel mistook for the 50th Infantry Division, while the Afrika Korps was to veer right to assault XIII Corps' rear.
An Italian division would attack the Alamein box from the west, while another would follow the 90th Light Division. The Italian XX Corps followed the Afrika Korps and dealt with the Qattara box. At the same time, the right flank would be protected by the 133rd Armoured Division "Littorio" and German reconnaissance forces. Rommel had premeditated to attack on 30 June, but supply and transportation problems caused a day's delay, which allowed the opposing troops to reorganise on the Alamein line. Moreover, the 90th Light Division was still 15 miles from the start line on 30 June, the 21st Panzer Division was immobilised due to a lack of fuel, and the promised air assistance had failed to arrive at its advanced airfields.
Panzer Army Africa Attacks
The 90th Light Infantry Division pushed east at 03:00 on 1 July but strayed too far north and was held down by the 1st South African Division's defences. A sandstorm and a severe air attack delayed the Afrika Korps' 15th and 21st Panzer Divisions. By the time they circled the back of Deir el Abyad, they had found the feature to the east of it had occupied by the 18th Indian Infantry Brigade, which had engaged the unprotected spot just west of Ruweisat Ridge and east of Deir el Abyad at Deir el Shein late on 28 June to make one of Norrie's extra defensive boxes after a hasty journey from Iraq.
On 1 July, about 10:00 a.m., the 21st Panzer Division launched an attack on Deir el Shein. The 18th Indian Infantry Brigade, backed with 23/25-pounder gun-howitzers, 16 new 6-pounder anti-tank guns, and nine Matilda tanks, fought all day bravely, but by dusk, the Germans had overrun them. Auchinleck was able to organise the defence of the western end of Ruweisat Ridge because of the time they purchased. The 1st Armoured Division had been dispatched to Deir el Shein to intervene. They encountered the 15th Panzer Division near Deir el Shein and drove it west. The Afrika Korps had 37 tanks left at the end of the day's action, out of a total of 55. The 90th light had escaped the El Alamein box defences and started its march eastward in the early afternoon. The three South African brigade groups fired artillery at it, and it was destroyed.
Rommel authorised the onslaught to resume on 2 July. After the 90th light failed to advance yet again, Rommel ordered the Afrika Korps to abandon their intended southerly sweep and join the effort to break through to the coast road by attacking east toward Ruweisat Ridge. The British defence of Ruweisat Ridge was based on an improvised structure known as "Robcol," which included a field artillery regiment, a light anti-aircraft artillery unit, and a company of infantry. Robcol was named after its commander, Brigadier Robert Waller, the 10th Indian Infantry Division Commander Royal Artillery, following standard British Army practice for ad hoc units. Robcol was able to purchase time, and by mid-evening, the four British armoured brigades had joined the fight, with the 4th Armoured Brigade fighting the 15th Panzer and the 22nd Armoured Brigade fighting the 21st Panzer. They repelled many attacks by Axis armour, which ultimately withdrew before dusk. On the night of 2 July, the British reinforced Ruweisat. Robcol was renamed "Walgroup" as it grew in size. Meanwhile, the Royal Air Force launched a series of air attacks on Axis forces.
Rommel instructed the Afrika Korps to begin their attack on the Ruweisat ridge the next day, 3 July, with the Italian XX Motorised Corps on its southern flank. Meanwhile, El Mreir was to be held by the Italian X Corps. The Afrika Korps had only 26 functioning tanks at this point. During the morning, a fierce armoured battle took place south of Ruweisat ridge, and the main Axis offensive was halted. The RAF flew 780 sorties on 3 July.
The XIII Corps on the left advanced from the Qattara box to relieve pressure on the Eighth Army's right and centre lines. The idea was for the New Zealand 2nd Division to swing north and threaten the Axis flank and rear with the remnants of the Indian 5th Division and 7th Motor Brigade under its command. Unfortunately, this unit ran into the artillery of the 132nd Armoured Division "Ariete," which was attacking Ruweisat from the division's southern flank. The Ariete lost 531 men, 350 prisoners, 36 pieces of artillery, six tanks, and 55 trucks after the Italian commander ordered his battalions to battle their way out on their own. The Ariete Division had only five tanks at the end of the day. The Afrika Korps and Ariete were defeated by the British 22nd and 4th Armoured Brigades, defeating Rommel's attempts to restart his offensive. The Royal Air Force (RAF) contributed to flying 900 sorties during the day.
To the south, the New Zealand group continued its march northwards towards El Mreir on 5 July, intending to cut the Ariete Division's rear. However, heavy fire from the Italian 27th Infantry Division "Brescia" at El Mreir, 5 miles north of the Qattara box, slowed their approach and forced XIII Corps to withdraw.
Rommel Digs In
Rommel realised at this point that his weary forces couldn't make any more progress until they rested and regrouped. He described to the German High Command that his three German divisions each had just 1,200–1,500 soldiers and that resupply was proving difficult due to enemy air interference. As a result, he expected to be on the defensive for at least the next two weeks.
Rommel was already suffering from the length of his supply lines at this point. The Allies concentrated their efforts on his vulnerable and long-distance supply channels, while British mobility columns advancing west and attacking from the south wreaked havoc on the Axis rear echelons. Rommel could no longer afford these losses, as shipments from Italy had been drastically limited. Meanwhile, the Eighth Army was reorganising and reconstructing, taking advantage of its limited communication connections. The Australian 9th division had arrived in the north by 4 July, and the Indian 5th Infantry Brigade had returned on 9 July, taking back the Ruweisat position. At the same time, the decimated Indian 5th Infantry Division was bolstered by the new Indian 161st Infantry Brigade.
Tel el Eisa
On 8 July, Auchinleck gave Lieutenant-General William Ramsden, the new commander of the XXX Corps, orders to conquer the low hills at Tel el Eisa and Tel el Makh Khad, and then to advance mobile fighting groups south into Deir el Shein and raiding parties west toward the El Daba airfields. Meanwhile, the Axis would be prevented from deploying troops north to reinforce the coastal area by the XIII Corps. Ramsden assigned the Tel el Eisa goal to the Australian 9th division, led by the 44th Royal Tank Regiment, and the Tel el Makh Khad objective to the South African 1st division, which had eight supporting tanks. The 1st Armoured Division was supposed to provide the raiding groups.
The Australian 26th Brigade launched an offensive against the ridge north of Tel el Eisa station along the seashore after a bombardment that began at 03:30 on 10 July. The bombardment was the most powerful ever seen in North Africa, causing terror among the inexpert militaries of the Italian 60th Infantry Division "Sabratha," who had recently occupied the sector's shaky defences. Nevertheless, more than 1,500 Australians were captured, an Italian division was routed, and the German Signals Intercept Company 621 was overrun. Meanwhile, the South Africans had captured Tel el Makh Khad and were in cover positions by late morning.
To cover the gap in the Axis defences, elements of the German 164th Light Division and the Italian 101st Motorised Division "Trieste" arrived. Tanks from the German and Italian Trieste Divisions conducted counter-attacks against Australian positions that afternoon and evening. Still, the counter-attacks were repulsed by overwhelming Allied artillery and anti-tank guns.
The Australian 2/24th Battalion, reinforced by tanks from the 44th Royal Tank Regiment, attacked the western end of Tel el Eisa hill at dawn light on 11 July. The feature was taken by early afternoon and held against several Axis counter-attacks during the day. A minor column of armour, motorised infantry, and weapons then raided Deir el Abyad, forcing an Italian infantry battalion to surrender. However, its progress was halted near the Miteirya ridge, and it was forced to retreat to the El Alamein box that evening. Over 1,000 Italian detainees were taken on the day.
On 12 July, the 21st Panzer Division thrown a counter-offensive against Trig 33 and Point 24, which was repulsed after a 212-hour battle, leaving more than 600 German dead and wounded scattered across the Australian lines. The 21st Panzer Division attacked Point 33 and South African forces in the El Alamein box the following day. The Royal Durban Light Infantry bore the full force of the German attacks in the El Alamein Box. However, the Royal Durban Light Infantry (RDLI) lacked appropriate anti-tank guns, while German artillery severed South African phone lines, further complicating field artillery support. In addition, the defenders' heavy artillery fire thwarted the attack. Even though the South Africans successfully repelled the German invasion, German tanks and dive bombers had reached up to 300 meters from the South African fortifications by 16:10. The German attack was repelled with the help of the 9th Australian field artillery and the 7th British Medium Regiment.
The 79th British Anti-Tank Regiment was despatched to support South African forces at last light, but the German offensive was winding down. On 13 July, South Africa had nine fatalities and 42 injuries. Even though South African casualties were low, their ability to endure German attacks nullified their losses. If Rommel's forces had taken the El Alamein Box, the repercussions for the Eighth Army would have been disastrous: the El Alamein line would have been broken, Australian troops would have been cut off from the Eighth Army, and the Eighth Army would have been forced to retreat to the Nile Delta. However, Rommel remained adamant about driving the British forces out of the northern salient. Even though the Australian troops were pulled back from Point 24, the 21st Panzer Division suffered terrible casualties. On 15 July, another attack was launched, but it was repulsed by persistent resistance. On 16 July, the Australians attempted an attack on Point 24 with the help of British tanks but were repulsed by German counter-attacks, losing nearly half a million casualties.
The fight for Tel el Eisa salient in the north faded after seven days of furious combat. At least 2,000 Axis troops were killed, and more than 3,700 prisoners of war were captured, according to the Australian 9th division. Unfortunately, however, the Australians had taken Signals Intercept Company 621, which provided Rommel with vital intelligence from British radio conversations, perhaps the most crucial aspect of the war.
First Combat of Ruweisat Ridge
As the Axis troops dug in, Auchinleck devised Operation Bacon, a plan to attack the Italian 17th Infantry Division "Pavia" and Brescia Divisions in the centre of the front at the Ruweisat ridge, after drawing some German units to the coastal sector during the Tel el Eisa battle. Auchinleck received precise data of the Axis battle order and forced dispositions from signals intelligence. Because of their low morale and the Germans' inability to hold broad fronts without them, his objective was to strike the Italians wherever feasible.
The plan was for the 4th and 5th New Zealand Brigades to assault from the northwest, seizing the western portion of the hill, and the Indian 5th Infantry Brigade to attack from the right, seizing the eastern section of the mountain a night attack. The 2nd Armoured Brigade would then pass over the heart of the infantry objectives, exploiting the opportunity to attack Deir el Shein and the Miteirya Ridge. Finally, on the left, the 22nd Armoured Brigade would be ready to advance and protect the troops as they consolidated on the crest.
On 14 July, around 23:00, the attack began. The two New Zealand brigades took their objectives shortly before dawn on 15 July, although minefields and pockets of resistance confused the attackers. Some pockets of resistance were left behind the advance of the forward soldiers, obstructing the movement of reserves, artillery, and support arms. As a result, except for a few anti-tank guns, the New Zealand brigades established exposed positions on the crest with no support weaponry. However, the two British artillery brigades failed to go forward to protect the troops. At dawn light, a detachment from the 8th Panzer Regiment of the 15th Panzer Division started a counter-offensive against the 22nd Battalion of the New Zealand 4th Brigade. After their anti-tank guns were destroyed in a fierce battle, the soldiers were left exposed in the open with little choice but to surrender. A total of 350 New Zealanders were detained.
The Indian 5th brigade made limited gains on Ruweisat Ridge to the east as the 2nd New Zealand Division attacked the western slopes. By 07:00, word had reached the 2nd Artillery Brigade, which had begun moving northwest. Two regiments were engulfed in a minefield, but the third could rejoin the Indian 5th Infantry 5th Brigade as the onslaught resumed. The Indians were able to take their targets by early afternoon with infantry and artillery support. Meanwhile, the 90th Light Division and the Ariete Armoured Division, marching from the south, had attacked the 22nd Armoured Brigade near Alam Nayil. While they quickly turned back the Axis probe with the support of mobile infantry and artillery columns from the 7th Armoured Division, they could not advance north to secure New Zealand's flank.
When Rommel learned that Brescia and Pavia were under siege, he dispatched German forces to Ruweisat. Under Lieutenant-General Walther Nehring's command, the 3rd Reconnaissance Regiment and part of the 21st Panzer Division from the north, the 33rd Reconnaissance Regiment, and the Baade Group containing forces from the 15th Panzer Division from the south were at location by 15:00. Nehring initiated his counter-offensive at 17:00. The 4th New Zealand Brigade was still short on support weapons and ammunition at this point. The anti-tank defences were overwhelmed again, and approximately 380 New Zealanders were captured, including Captain Charles Upham. He was awarded a second Victoria Cross for his actions, which included destroying a German tank, some guns and vehicles with grenades despite being shot in the elbow by a machine gun bullet. The brigade HQ was overwhelmed around 18:00. The Axis' eastward march was halted when the 2nd Armoured Brigade attacked the German armour around 18:15. Nehring called a halt to the proceedings around dusk.
On 16 July, Nehring relaunched his assault. The 5th Indian Infantry Brigade forced them back, but intercepted radio transmission indicated that they would try again. A squadron from the 22nd Armoured Brigade was deployed to reinforce the 2nd Armoured Brigade, making strenuous preparations to dig in anti-tank guns and artillery fire plans. A troop from the 22nd Armoured Brigade was ordered to support the 2nd Armoured Brigade. The onslaught was defeated when it resumed late in the afternoon. After the conflict, the Indians discovered 24 knocked-out tanks, armoured cars, and multiple anti-tank guns on the battlefield.
The Allies captured about 2,000 Axis prisoners in three days, mainly from the Pavia Divisions and Italian Brescia; the New Zealand Division suffered 1,405 losses. Three Italian divisions had been destroyed in the battle at Tel el Eisa and Ruweisat, forcing Rommel to reposition his armour from the south and forcing him to build minefields in front of the surviving Italian divisions stiffening them with detachments of German infantry.
Miteirya Ridge
Auchinleck instructed the Australian 9th division to advance north to alleviate pressure on the Ruweisat Ridge. The Australian 24th Brigade, supported by the 44th Royal Tank Regiment and strong fighter cover from the air, attacked Miteirya ridge, dubbed "Ruin ridge" by the Australians, in the early hours of 17 July. The initial night raid was successful, yielding 736 prisoners. The majority were from the Italian Trento and Trieste motorised divisions. However, the Axis forces were saved from a dangerous situation by ferocious counter-attacks from rapidly organised German and Italian forces, forcing the Australians to retreat to their starting line with 300 fatalities. Although the counter-attack force was described as "German" in the Australian Official History of the 24th Brigade's 2/32nd Battalion, Australian historian Mark Johnston notes that German documents indicate that the Trento Division overran the Australian battalion.
Second Battle of Ruweisat Ridge
The Eighth Army now had a tremendous material advantage over the Axis forces: the 1st Armoured Division had 173 tanks and more in reserve or transit, including 61 Grants, whilst Rommel only had 38 German tanks and 51 Italian tanks, with another 100 tanks awaiting repair.
The Indian Infantry 161st Brigade would advance along Ruweisat ridge to take Deir el Shein, while the New Zealand 6th Brigade would strike from the south of the ridge to the El Mreir depression, according to Auchinleck's plan. Two British armoured brigades, the 2nd Armoured Brigade and the new 23rd Armoured Brigade would sweep through the infantry gap at daybreak. The strategy was intricate and ambitious.
On 21 July, around 16:30, the infantry night attack began. In the El Mreir depression, the New Zealand attack achieved its objectives, although several vehicles failed to arrive, and they were short on support weaponry in an exposed position. As a result, the British armoured brigades could not advance at dawn on 22 July. Instead, on 22 July, Nehring's 5th and 8th Panzer Regiments launched a fast counter-offensive, quickly overrunning the New Zealand soldiers in the open and inflicting over 900 fatalities on the Kiwis. Two regiments of the 2nd Armoured Brigade were pushed forward to assist, but mines and the anti-tank fire stopped them.
The Indian 161st Brigade's offensive met with mixed results. The preliminary effort to clear the western end of Ruweisat on the left failed, but the reserve battalion's retaliation at 08:00 succeeded. The attacking division broke inside the Deir el Shein position on the right but was forced back in hand-to-hand combat.
To add to the misery at El Mreir, the commander of the 23rd Armoured Brigade ordered his brigade forward at 08:00, determined to carry out his orders to the letter. However, the 1st Armoured Division commander, Major-General Gatehouse, was sceptical that a passage had been effectively cleared in the minefields and requested that the advance be halted. Lieutenant-General William Gott, commander of the XIII Corps, disagreed and ordered the attack on a centre line 1 mile south of the original plan, which he wrongly believed was mine-free. These orders were not carried out, and the invasion proceeded as planned. However, the brigade became entangled in minefields and came under intense fire. At 11:00, they were counter-attacked by 21st Panzer and forced to retire. The 23rd Armoured Brigade was decimated, with 40 tanks destroyed and 47 others severely damaged.
Gott ordered the 5th Indian Infantry Division to launch a night attack on the western part of Ruweisat Ridge and Deir el Shein at 17:00. The 9th Indian Infantry Brigade's 3/14th Punjab Regiment attacked at 02:00 on 23 July but failed because they lost their bearings. A second effort in daylight succeeded in getting into the position. Still, control was lost when the commanding officer was killed, and four of his senior officers were injured or went missing due to intensive fire from three sides.
Attack on Tel el Eisa Resumed
The Australian 9th Division continued its assaults to the north. The Australian 26th Brigade attacked Tel el Eisa, and the Australian 24th Brigade attacked Tel el Makh Khad near Miteirya at 06:00 on 22 July. During this battle, Arthur Stanley Gurney's efforts for which he was posthumously awarded the Victoria Cross. The struggle for Tel el Eisa was costly, but the Australians had taken possession of the feature by the afternoon. The Australian 24th Brigade attacked Tel el Makh Khad later that evening, with help from the 50th RTR tanks. However, the tank unit lacked close infantry support training and could not coordinate with the Australian troops. As a result, the infantry and armour proceeded independently, and the 50th RTR lost 23 tanks due to a lack of infantry support after reaching the objective.
Despite overwhelming superiority in human resources and equipment, the Eighth Army failed to eliminate Rommel's forces. On the other hand, Rommel's condition remained dire, as his infantry had sustained enormous losses despite practical defensive actions, and he stated that the situation was difficult in the extreme.
In a last effort to break the Axis forces, Auchinleck launched Operation Manhood in the northern sector on the 26th and 27th of July. The 1st Armoured Division, 4th Light Armoured Brigade, and 69th Infantry Brigade were added to the XXX Corps. The goal was to break the enemy line south of Miteirya ridge and exploit the northwest. By midnight on July 26/27, the South Africans were to make and indicate a break in the minefields to the southeast of Miteirya. The 24th Australian Infantry Brigade was supposed to have taken the eastern end of the Miteirya ridge by 01:00 on 27 July and exploited it to the northwest. To get to Deir el Dhib, the 69th Infantry Brigade would cross through a minefield gap created by the South Africans and clear and mark holes in other minefields. After that, the 2nd Armoured Brigade would pass through to El Wishka, followed by the 4th Light Armoured Brigade, which would strike the Axis communication lines.
The Axis troops expected the attack, as it was the third attempt to breakthrough in the northern sector. However, it was hasty and poorly planned, like the other attacks. By 02:00 on 27 July, the Australian 24th Brigade had achieved its objectives on Miteirya Ridge. To the south, the British 69th Brigade launched an attack at 01:30 and completed their mission by around 08:00. However, when daylight came, the supporting anti-tank units were lost in the darkness or delayed by minefields, leaving the attackers isolated and unprotected. Succeeding that, there was a period of confusion and conflicting reports from the battlefront regarding the minefield gaps. As a result, the 2nd Armoured Brigade's attack was delayed. Rommel launched an instant counter-offensive, and German tank battlegroups overran the 69th Brigade's two advanced battalions.
Meanwhile, the 50th RTR, which was assisting the Australians, was having trouble detecting the minefield gaps dug by the 2/24th Battalion. They were unable to locate a way through and were subsequently caught in heavy fire, losing 13 tanks in the process. On the ridge, the unsupported 2/28th Australian battalion was overrun. For no gain, the 69th brigade suffered 600 fatalities and the Australians 400.
Although the combat ended in a draw, it slowed the Axis push on Alexandria. In July, the Eighth Army had lost nearly 13,000 men, counting 3,000 in the 5th Indian Infantry Division, 4,000 in the 2nd New Zealand Division, and 2,552 battle casualties in the 9th Australian division. Still, it had captured 7,000 Axis soldiers and machines. Auchinleck stated in his 27 July assessment that the Eighth Army would not be ready to assault again until at least mid-September. However, he believed Rommel was obligated to assault as soon as possible. Before the end of August, he would have superiority in armour since he realised that the Allied situation would only improve with time. As a result, Auchinleck devised a defensive strategy.
On their route to meet Joseph Stalin in Moscow, Winston Churchill and General Sir Alan Brooke the Leading of the Imperial General Staff, visited Cairo in early August. They chose to replace Auchinleck, appointing William Gott, the commander of the XIII Corps, to the Eighth Army leadership and General Sir Harold Alexander, the C-in-C Middle East Command, to the Eighth Army command. Persia and Iraq were separated from Middle East Command and given their control, with Auchinleck being offered the position of C-in-C. Unfortunately, Gott was killed when his plane was shot down on the way to take charge. Lieutenant-General Bernard Montgomery was named on 13 August and assumed command.

October 25, 2023

January 02, 2025
 The Division Between Pagan and Christian Rome: Unity or Fragmentation Before the Fall of the Western Roman Empire
 Religious Conflicts and the Rise of Christianity in Late Rome: Faith, Power, and the Fall of the Western Roman Empire
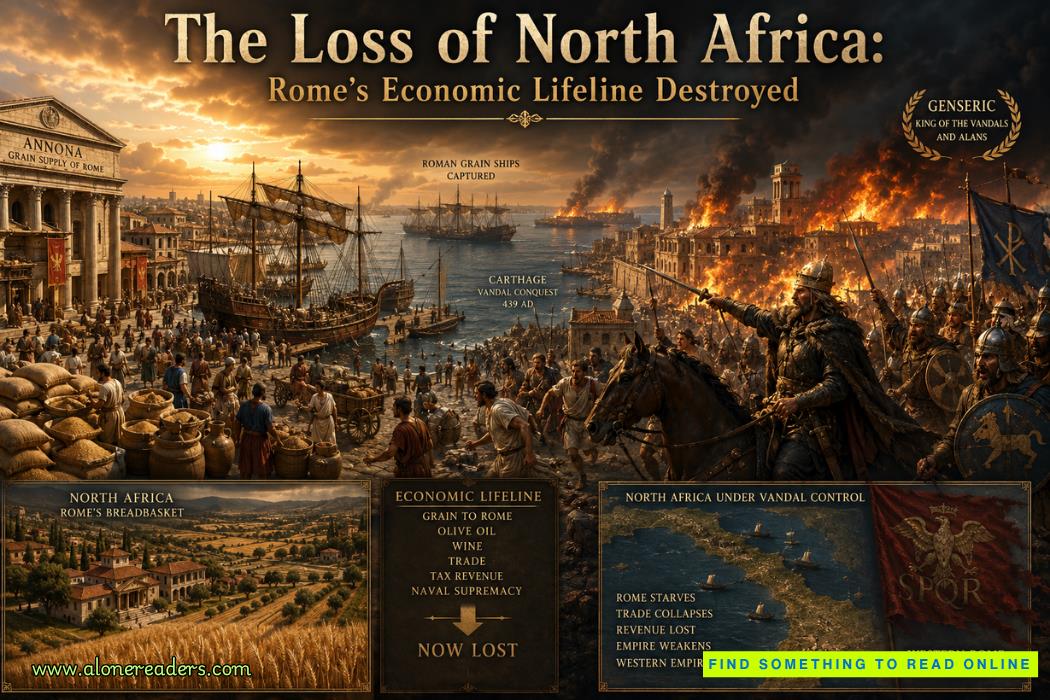 The Loss of North Africa: Rome’s Economic Lifeline Destroyed and the Road to the Fall of the Western Roman Empire
 The Collapse of Roman Britain: How Rome's Withdrawal Reshaped Western Europe
 Vinland and North America: Leif Erikson’s Journey to the New World Explained
 Erik the Red and the Discovery of Greenland: Norse Exploration and Colonization
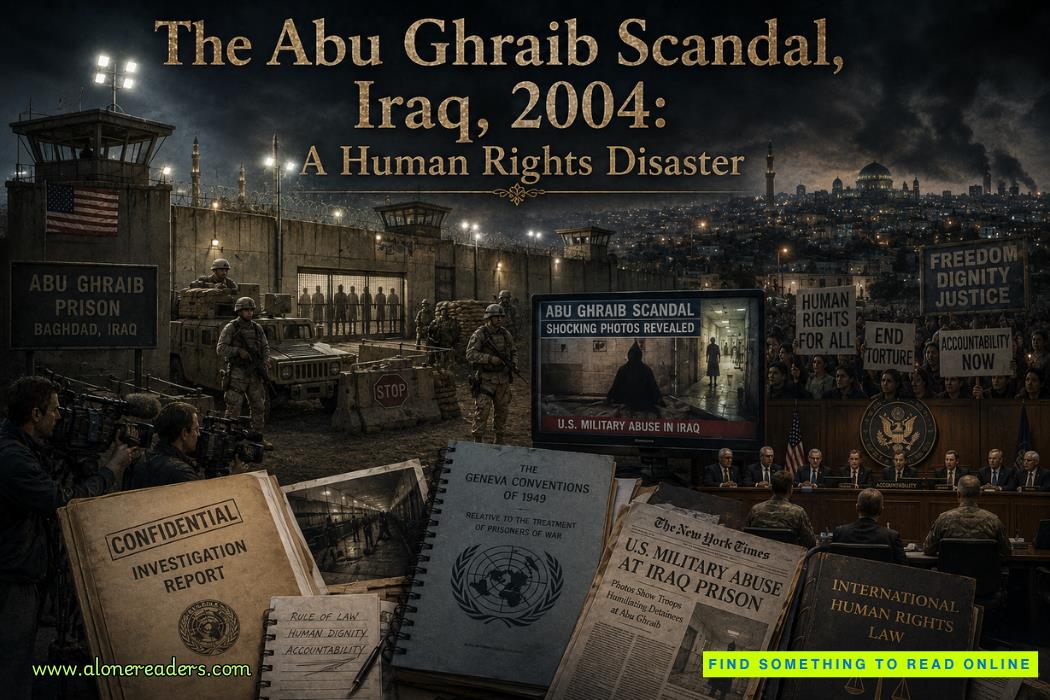 The Abu Ghraib Scandal, Iraq, 2004: A Human Rights Disaster That Shook the World
 The Disbanding of the CNRP, Cambodia, 2017: Hun Sen's Clampdown on Democracy and the Reshaping of Cambodian Politics
 The Firing of James Comey, United States, 2017: Trump's Controversial Decision Amid FBI Investigation
 The Rwandan Refugee Crisis, Central Africa, 1994: Aftermath of Genocide and the Humanitarian Catastrophe
 The Most Important Turning Points of the Battle of Hastings (1066)
 Why William Won the Battle of Hastings and Harold Lost: Strategy, Leadership and Fate in 1066
 How King Harold II Died: Facts, Myths, and Historical Debate
 The Battle of Hastings: A Complete Timeline of the Fighting
 High-End Talent Category A Work Permit China 2026: Complete Eligibility, Benefits, Application Process, and Expert Guide
 Cultural Activities Visa Japan 2026 Guide: Complete Eligibility, Requirements, Application Process, and Expert Tips